Driving Canada’s epic roads is an operational challenge that demands a professional mindset, not a casual tour.
- The legal minimum for equipment, like tires, is often dangerously insufficient for actual mountain conditions.
- Strategic timing—when you leave, how long you stop—is your most powerful tool for risk mitigation.
- The biggest hazards are often not just weather or wildlife, but complacency and other unprepared drivers.
Recommendation: Adopt a pro’s operational mindset. Plan for contingencies, understand the real rules of the road, and prioritize getting home safely over getting the perfect photo.
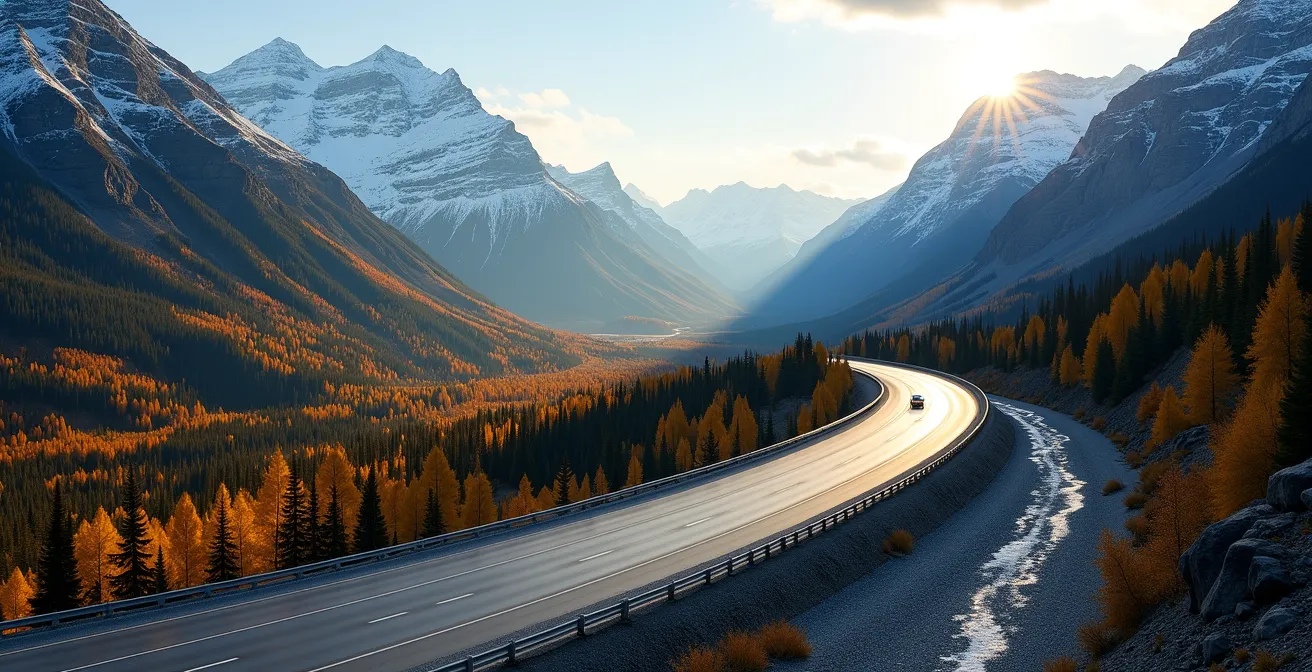
The image of the Icefields Parkway is iconic: a ribbon of blacktop winding through a valley of turquoise lakes and colossal, glacier-clad peaks. It’s a bucket-list drive for a reason. But as a professional driver who has spent countless hours on this and other demanding Canadian routes, I can tell you that the dream can turn into a nightmare in a heartbeat. Too many road-trippers arrive with a full tank of gas but an empty tank of preparation, worried about road closures but not about the dozens of other factors that could end their trip early.
You’ve probably heard the usual advice: “check the weather,” “watch for wildlife.” This is the stuff of tourist brochures. It’s not wrong, but it’s dangerously incomplete. It doesn’t prepare you for the sudden whiteout on the Coquihalla summit, the 300-kilometre fuel gap on the Dempster, or the legal nuances of a Parks Canada pass. It doesn’t teach you the operational mindset required to assess risk and make smart decisions.
This guide is different. We’re going to put the “selfie-stick” mentality aside and adopt the perspective of a professional. The real key to conquering Canada’s most beautiful and demanding roads isn’t a better camera; it’s a better strategy. It’s about understanding that every iconic drive, from the Icefields Parkway to the Cabot Trail, is a mission-critical operation where safety is the only goal.
We will break down the critical decisions you need to make long before you turn the key. We’ll examine real-world case studies from coast to coast to build an unshakeable foundation of situational awareness and risk mitigation. This isn’t just about driving; it’s about operating your vehicle with the respect these wild places demand.
Summary: A Pro Driver’s Guide to Canada’s Toughest Roads
- Why Leaving at 6 AM is Crucial for the Cabot Trail in July?
- Winter Tires vs. All-Seasons: What is Legally Required on BC Mountain Highways?
- Do You Need a Parks Canada Pass Just to Drive Through Banff National Park?
- The 300 km Gap: Where to Fuel Up on the Dempster Highway to Avoid Stranding
- The Pull-Over Rule: How to Enjoy Scenic Views Without Causing a Pile-Up
- Why Doing the Cabot Trail in One Day is a Mistake
- The Coquihalla Highway: Why You Need Chains or Winter Tires to Reach Big White?
- How to Drive the Cabot Trail: Clockwise or Counter-Clockwise?
Why Leaving at 6 AM is Crucial for the Cabot Trail in July?
On a postcard-perfect route like the Cabot Trail, timing isn’t about “beating the traffic”—it’s a core component of your risk mitigation strategy. Leaving at the crack of dawn, especially in peak season, is a non-negotiable for professionals. The first reason is weather volatility. On the Cape Breton coast, it’s not uncommon for the weather to change from dense fog to full sun within an hour. An early start gives you a critical buffer to wait out a patch of fog or to complete the most challenging coastal sections before visibility deteriorates.
The second factor is traffic composition. The Cabot Trail is narrow, winding, and full of steep grades. By mid-morning in July, the road is clogged with large RVs and hesitant drivers who are unfamiliar with the route. They travel slowly, brake unexpectedly, and often struggle with the inclines. This creates a chain of unpredictable hazards. An early start allows you to navigate the most technical parts of the drive, like the ascents around Cape Smokey, before this high-risk traffic pattern emerges. You get a clean road, better flow, and significantly reduced stress.
Finally, an early departure is about maximizing your daylight and opportunities. Popular trailheads like the Skyline Trail are overwhelmed by 9:00 AM. Starting early means you can complete a 2-3 hour hike and be back on the road before the parking lots are full and the trails are crowded. It allows you to enjoy the experience as intended, without the pressure of a ticking clock or the danger of driving winding, unlit roads after dusk, when the risk of encountering a moose—a collision that is often fatal for both driver and animal—increases exponentially. Your start time dictates the entire safety profile of your day.
Winter Tires vs. All-Seasons: What is Legally Required on BC Mountain Highways?
Nowhere is the gap between “legal” and “safe” more apparent than on British Columbia’s mountain highways. As a driver, you must understand this distinction. Legally, winter tires are required from October 1 to April 30 on most designated BC routes, including the Sea-to-Sky and the Coquihalla. The key detail, however, is the *type* of tire that qualifies.
The legal minimum is a tire marked with “M+S” (Mud and Snow). These are often marketed as “all-season” tires. Let me be blunt: relying on M+S tires for a winter drive on the Coquihalla is a dangerous gamble. The M+S designation has no standardized performance test for snow or ice traction. In contrast, a proper winter tire carries the Three-Peak Mountain Snowflake (3PMSF) symbol. This symbol certifies that the tire has met a minimum performance standard in controlled snow traction tests. The rubber compounds are softer and remain flexible in freezing temperatures, and the tread patterns are designed to bite into snow and evacuate slush.
This illustration shows the 3PMSF symbol you should look for on the sidewall of a true winter tire. It’s not a brand logo; it’s a safety certification.
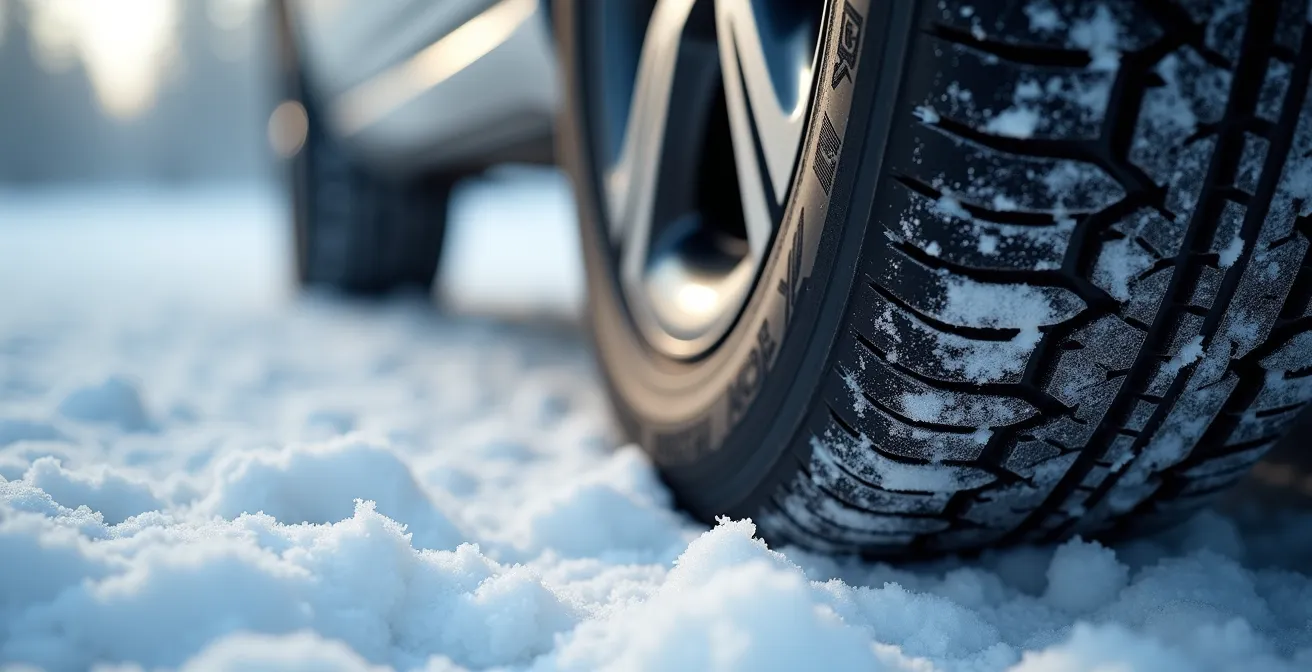
The difference in performance is not subtle. On cold, snowy, or icy pavement, the stopping distance and cornering grip of a 3PMSF tire are vastly superior to an M+S tire. For a professional, there is no debate. The choice is always the tire that provides the greatest margin of safety, not the one that simply meets the bare minimum legal requirement.
This table from tire safety experts clearly breaks down the difference. As you can see, the legal minimum doesn’t guarantee true winter performance.
| Tire Type | Legal Status in BC | Performance | Recommendation |
|---|---|---|---|
| M+S (Mud & Snow) | Legal minimum requirement | Basic traction, no performance test required | Adequate for light winter conditions only |
| 3PMSF (Three-Peak Mountain Snowflake) | Meets all requirements | Must pass standardized snow traction test | Recommended for true winter safety on Coquihalla |
Do You Need a Parks Canada Pass Just to Drive Through Banff National Park?
This is a common point of confusion that can lead to fines and frustration. The answer is nuanced and depends entirely on which road you are on and what you do. The core principle is this: are you using the highway for transit, or are you engaging in a tourism activity? The Trans-Canada Highway (Highway 1) is considered a national transportation corridor. Therefore, you are legally permitted to drive through Banff National Park on Highway 1 without a park pass, provided you do not stop. This exemption is for non-stop travel only.
The moment you pull over, you are no longer transiting; you are visiting. If you stop for fuel in Banff town, grab a coffee in Lake Louise, pull over at a viewpoint for a photo, or even use a restroom, you are legally required to have a valid Parks Canada Discovery Pass. Park Wardens do patrol parking lots and popular pull-outs, and a ticket is an unpleasant way to start a vacation. There is no grey area here: stopping equals visiting, and visiting requires a pass.
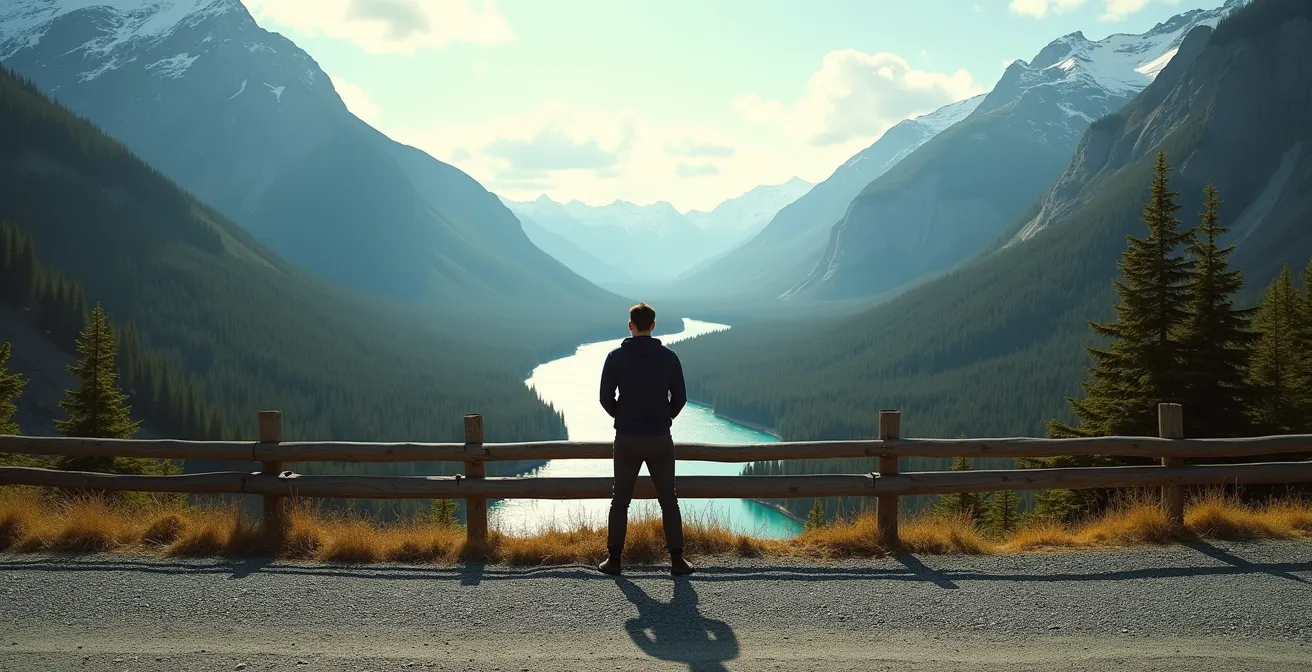
Crucially, this exemption does *not* apply to the Icefields Parkway (Highway 93). The Parkway is classified as a scenic parkway, not a transportation corridor. Its entire purpose is recreational. Therefore, a Parks Canada pass is mandatory to drive on any part of the Icefields Parkway, regardless of whether you plan to stop or not. A checkpoint is often in place near the junction with the Trans-Canada Highway where passes are checked. Trying to “just drive a little bit” of it without a pass is not an option. For frequent visitors, it’s worth noting that a yearly Discovery Pass pays for itself after just 7 days of park visits, making it a cost-effective choice for any serious road tripper.
The 300 km Gap: Where to Fuel Up on the Dempster Highway to Avoid Stranding
If the Cabot Trail is a test of timing and the Coquihalla a test of equipment, the Dempster Highway is a masterclass in managing your margin of safety. This 740 km gravel road to Inuvik is one of Canada’s ultimate drives, but it is profoundly unforgiving. The single most critical resource to manage is fuel. Between the start of the highway and Fort McPherson, there is a nearly 370 km stretch with only one service station: Eagle Plains. Missing it or finding it closed means you are stranded.
An “operational mindset” means you don’t just fill up; you calculate, plan, and build in redundancy. Your vehicle’s stated fuel economy is useless here. The constant, powerful headwinds can increase your fuel consumption by 25-30% or more. You are not just driving; you are pushing against an immense force of nature. Furthermore, the gravel surface itself increases rolling resistance. You must assume you will use significantly more fuel than on a paved road.
Relying solely on the stop at Eagle Plains is poor planning. It has limited hours, and there’s no guarantee its pumps are operational. A professional driver always carries a reserve. This isn’t a suggestion; it’s a rule. You must carry extra fuel in approved jerry cans. This is your lifeline. The goal is to arrive at your destination with a comfortable reserve, not to coast in on fumes. This is the definition of a margin of safety.
Action Plan: Dempster Highway Fuel Strategy
- Contingency Fuel: Carry a minimum of 20-40 litres of extra fuel in approved, properly secured containers before starting.
- Initial Fill-Up: Fill your vehicle’s tank completely in Dawson City (southbound) or Inuvik (northbound) as your starting point.
- The Only Waypoint: Plan to stop at the Eagle Plains Hotel, but never rely on it as your only option. Be aware of its limited hours and potentially high prices.
- Consumption Calculation: Mentally add 25-30% to your normal fuel consumption to account for headwinds and road surface.
- The Final Leg: The Inuvik-Tuktoyaktuk Highway has no services. The last fuel stop in Inuvik is your final chance before the 280 km round trip to the Arctic Ocean.
The Pull-Over Rule: How to Enjoy Scenic Views Without Causing a Pile-Up
On a road as stunning as the Icefields Parkway, the temptation to stop suddenly for a wildlife sighting or a photo is immense. This is also one of the most dangerous things a driver can do. Your situational awareness must extend beyond your own vehicle to include the traffic behind you. A sudden stop can easily cause a multi-car pile-up. The “Pull-Over Rule” is about courtesy, safety, and the law.
The first step is clear communication. As the Banff and Beyond Travel Guide wisely puts it, your intention to stop must be signalled far in advance.
Signal your intention to pull over well in advance (at least 100-150 meters). On high-speed, winding roads like the Icefields Parkway, a sudden stop is a primary cause of rear-end collisions.
– Banff and Beyond Travel Guide, Tips for Driving the Icefields Parkway
The second step is using designated pull-outs only. These are specifically designed to allow vehicles to exit and re-enter the flow of traffic safely. Stopping on the shoulder, even partially, is prohibited and extremely dangerous. It obstructs the roadway and forces other drivers to swerve around you. This is especially critical during “bear jams” or other wildlife sightings. Parks Canada regulations are explicit: you must pull completely off the roadway into a designated area if it is safe to do so, and you must remain in your vehicle. Fines for unsafe stopping or feeding wildlife are substantial.
Finally, you have a legal obligation not to impede traffic. On many Canadian mountain highways, there are designated “Slower Vehicle Pullouts.” If you are driving below the speed limit and have three or more vehicles backed up behind you, you are legally required to use the next pullout to let them pass. This isn’t just a courtesy; it’s the law. It maintains traffic flow and prevents frustrated drivers from attempting dangerous passes. Enjoying the view is part of the experience, but never at the expense of safety.
Why Doing the Cabot Trail in One Day is a Mistake
Attempting the Cabot Trail in a single day is a classic rookie mistake, born from looking at a map instead of understanding the terrain. On paper, it seems manageable. But the 298 km loop takes nearly 5 hours of pure, non-stop driving. This calculation allows zero time for photos, hikes, meals, or simply absorbing the stunning scenery. Rushing the Cabot Trail isn’t just a poor travel experience; it’s a safety hazard.
Driver fatigue is the primary risk. After 3-4 hours of intense focus on winding, hilly roads, your reaction time slows, and your decision-making is impaired. Pushing to “finish” in one day means you’ll be driving the most technically demanding sections, like the French and MacKenzie mountains on the west coast, in the late afternoon when you are already tired. This is a recipe for disaster. It also means you’ll likely be driving into the setting sun, dealing with intense glare, or worse, finding yourself on unlit mountain roads after dark, with the constant threat of moose encounters.
Moreover, a one-day dash completely misses the point of the drive. The Cabot Trail is not just a road; it’s a cultural journey. You pass through vibrant Scottish Gaelic communities near St. Ann’s and Baddeck, and the rich Acadian French culture around Chéticamp. Rushing means you have no time to stop at a local bakery, listen to fiddle music, or hike a rewarding trail like the Skyline, which requires 2-3 hours on its own. An overnight stay, perhaps in Pleasant Bay or Chéticamp, transforms the drive from a stressful marathon into a relaxing and immersive experience. It allows you to watch the sunset over the Gulf of St. Lawrence and wake up refreshed for the second half of the journey.
The Coquihalla Highway: Why You Need Chains or Winter Tires to Reach Big White?
The Coquihalla Highway (Highway 5) is infamous for a reason. It’s a high-altitude mountain pass where weather conditions are extreme and can change with terrifying speed. The route is the most direct path from the Lower Mainland to the Okanagan, home to ski resorts like Big White. But to get there, you must be prepared for a true winter battle. The primary factor is elevation. The Coquihalla Summit reaches an elevation of 1,244 meters (4,081 feet). Even if it’s raining in Hope at the base, it can be a full-blown blizzard at the summit.
This is why proper winter tires (with the 3PMSF symbol) are not just recommended; they are essential for survival. All-season (M+S) tires lose their grip and become hard as plastic in the freezing temperatures common at these altitudes. Even with proper winter tires, conditions can deteriorate so rapidly that chains become necessary. Carrying a set of properly fitting chains and knowing how to install them is a critical part of your safety equipment.
The journey to Big White Ski Resort involves a second, even higher pass: the Okanagan Connector (Highway 97C), which features the Pennask Summit at a staggering 1,728 meters (5,669 feet). The risks are compounded here. Anyone heading to the ski hill must adopt an operational mindset and follow a strict pre-trip protocol. This includes:
- Checking the variable speed limit signs, which are adjusted in real-time based on conditions.
- Being hyper-aware of “snow sheds”—tunnel-like structures that can be far icier than the open road due to shade.
- Carrying chains and a full winter survival kit (blankets, food, water, shovel).
- Monitoring the official road conditions on DriveBC.ca right up until the moment of departure.
The “it won’t happen to me” attitude has left countless vehicles in the ditch on the Coquihalla. Respect the mountain, or it will teach you a harsh lesson.
Key Takeaways
- Driving Canada’s iconic routes requires an “operational mindset,” treating each trip as a planned mission, not a casual drive.
- The legal minimum for equipment, especially winter tires (M+S), is often insufficient for true safety in mountain conditions; always opt for the 3PMSF standard.
- Strategic planning—including departure time, fuel management, and route direction—is your most effective tool for mitigating risks like traffic, weather, and fatigue.
How to Drive the Cabot Trail: Clockwise or Counter-Clockwise?
Once you’ve committed to a proper, multi-day trip, the next strategic decision for the Cabot Trail is direction. This choice significantly impacts your experience, particularly your views and your ease of travel. While both directions offer breathtaking scenery, the consensus among experienced drivers overwhelmingly favors a counter-clockwise route, typically starting from Baddeck and heading north towards Ingonish.
The primary reason is your position on the road. Driving counter-clockwise places you in the outside lane, directly adjacent to the Atlantic Ocean along the eastern coast and the Gulf of St. Lawrence on the western coast. This provides the driver with unobstructed, panoramic water views for the most dramatic sections of the drive. It also makes accessing the numerous scenic lookouts much safer and easier, as most are located on the right-hand side of the road, eliminating the need to cross oncoming traffic.
The table below summarizes the key differences in experience based on your chosen direction. For most drivers, especially those who may be nervous about heights, the counter-clockwise option provides a more comfortable and visually rewarding journey.
| Direction | Ocean Views | Pull-offs Access | Passenger Experience |
|---|---|---|---|
| Counter-Clockwise | Driver in outside lane for best ocean views | Easy right-hand entry to scenic lookouts | Passenger away from cliff edges |
| Clockwise | Passenger gets ocean views | Must cross traffic for most viewpoints | Passenger experiences cliff-edge thrills |
As Canadian automotive journalist Stephanie Wallcraft, a seasoned road-tripper, advises, aligning your drive with the sun and the sea is the optimal strategy.
We recommend heading counterclockwise on the Cabot Trail, starting from Baddeck or Ingonish in the morning. You’ll drive on the closest side of the road to the ocean and follow the same path as the sun.
– Stephanie Wallcraft, Road Trip Locals – Canadian Automotive Journalist of the Year 2024
This small decision has a major impact on the quality and safety of your drive, proving that a successful trip is the sum of many well-thought-out details. Adopting this level of planning is the hallmark of a professional approach.
By internalizing these principles—from tire choice and fuel planning to timing and road etiquette—you shift from being a tourist to being a capable operator. These aren’t just tips for one road; they are a universal framework for safely exploring the most magnificent and challenging drives Canada has to offer. The best souvenir from any road trip is a safe return, armed with incredible memories. Plan your drive like a professional, and you’ll ensure that’s exactly what you get.