
The secret to booking a popular Alpine Club of Canada hut isn’t about having the fastest internet connection; it’s about mastering the entire logistical chain long before booking day arrives.
- Success depends on a holistic strategy that connects physical fitness, gear preparation, backcountry etiquette, and an understanding of the rules.
- Treating the booking as the final step—the reward for comprehensive preparation—dramatically increases your chances against the thousands of others vying for a spot.
Recommendation: Shift your focus from the booking race to a months-long preparation cycle. Your journey to the hut begins with the first training hike, not the first click.
You’ve been there. The clock strikes 9:00 AM MST. You refresh the Alpine Club of Canada (ACC) booking page, your dream trip to the Elizabeth Parker or Abbott Pass hut just a few clicks away. Then, chaos. The page slows to a crawl, and by the time it loads, every single weekend slot for the entire season is gone. The common advice you’ve heard—”be fast,” “have your login ready,” “use multiple devices”—feels hollow and inadequate. You followed the rules of the race, yet you still lost.
Here’s the hard truth those tips miss: you’re not just competing against other people; you’re competing against their preparation. The successful booking of a high-demand ACC hut isn’t a 60-second sprint. It’s the finish line of a marathon that begins months, sometimes a year, in advance. It’s a test of what I call the logistical chain—a series of interconnected challenges spanning physical conditioning, meal planning, safety protocols, and a deep understanding of what it means to be a responsible guest in the Canadian backcountry.
This guide isn’t about clicking faster. It’s about building a bulletproof strategy that makes the booking process the easy part. We will dismantle the entire system, piece by piece, so you can transform from a frustrated aspiring mountaineer into a prepared backcountry citizen who earns their spot. We will cover the unwritten rules and logistical hurdles that trip up 99% of first-timers, ensuring you arrive on booking day not just with hope, but with the quiet confidence of total preparation.
This article breaks down the complete logistical system you need to master. By understanding each link in the chain, from your physical capacity to your insurance coverage, you’ll see the booking process in a completely new light.
Summary: The Complete System for Booking an ACC Hut
- Elevation Gain: Are You Fit Enough to Hike 1000m Vertical with a 30lb Pack?
- Quiet Hours and Chores: The Unwritten Rules of Sharing a Backcountry Hut
- Dehydrated vs. Fresh: Meal Planning for 3 Days in a Hut with No Fridge
- Skis or Snowshoes: How to Access Backcountry Huts safely in Winter?
- Outhouses and Barrels: How to Handle Human Waste and Trash at High Altitude?
- Canmore or Banff: Which Town Base Offers Better Value for Hikers?
- The Bear Canister Rule: Where is Hanging Food No Longer Allowed?
- Do You Need Extra Health Insurance for Backcountry Rescue in Canada?
Elevation Gain: Are You Fit Enough to Hike 1000m Vertical with a 30lb Pack?
Before you even think about the booking page, the first question must be: can you physically handle the approach? Many aspiring visitors underestimate this crucial first link in the logistical chain. We’re not talking about a casual walk in the park; many ACC hut approaches are serious mountain endeavours. This is where the concept of the “Fitness-to-Book Ratio” comes in. Your ambition to book a hut should be directly proportional to your proven physical ability. Booking a spot you can’t safely reach puts you and potential rescuers at risk.
The numbers don’t lie. A hut’s accessibility is often measured in kilometres and elevation gain, and you need to be honest about your capacity. The training process is not just about building endurance, but also about testing your body with a weighted pack on relevant terrain. Start with a 20lb pack and gradually increase it to the 30-40lb range you’ll likely carry with food, gear, and safety equipment. This prepares your legs, back, and shoulders for the specific strain of a multi-hour ascent.
Case Study: Asulkan Hut Approach Benchmark
To put it in perspective, the summer approach to the Asulkan Hut in Glacier National Park is a demanding trip. It covers 6.5 kilometres with a significant elevation gain to 2100 metres. For a fit hiker, this typically takes 3-4 hours and involves navigating varied terrain that is consistently steep and rugged. This isn’t a simple trail; it’s a sustained high-altitude effort that requires a solid fitness base and mountain sense. Using this as a benchmark for your training provides a realistic goal for what the Canadian Rockies demand.
Your training should mimic these conditions. Seek out local trails with at least 700m of elevation gain for base fitness, and progress to sustained 1000m+ climbs. Incorporating back-to-back training days is also critical, as it simulates the physical toll of a multi-day hut trip where you don’t get a full recovery day in between hikes. This rigorous preparation ensures that when you do secure a booking, the physical journey is a source of joy, not a dangerous struggle.
Quiet Hours and Chores: The Unwritten Rules of Sharing a Backcountry Hut
Securing a booking is an entry ticket into a temporary, self-governing micro-community. The second link in the logistical chain is understanding the concept of backcountry citizenship. It’s a set of unwritten (and sometimes written) rules that govern communal living in a remote, shared space. Failing to grasp this social contract is the quickest way to ruin the experience for yourself and everyone else. These huts are not hotels; they are collaborative shelters where every guest has a role to play in its smooth operation.
This collaboration starts with the basics: respect quiet hours (typically 10 PM to 7 AM), keep your gear organized and contained, and be mindful of shared spaces like the kitchen and common area. But it goes deeper. Most huts operate on a system of shared duties. This isn’t optional; it’s a fundamental part of the hut experience. These chores ensure the hut remains functional and comfortable for the next group of arrivals.
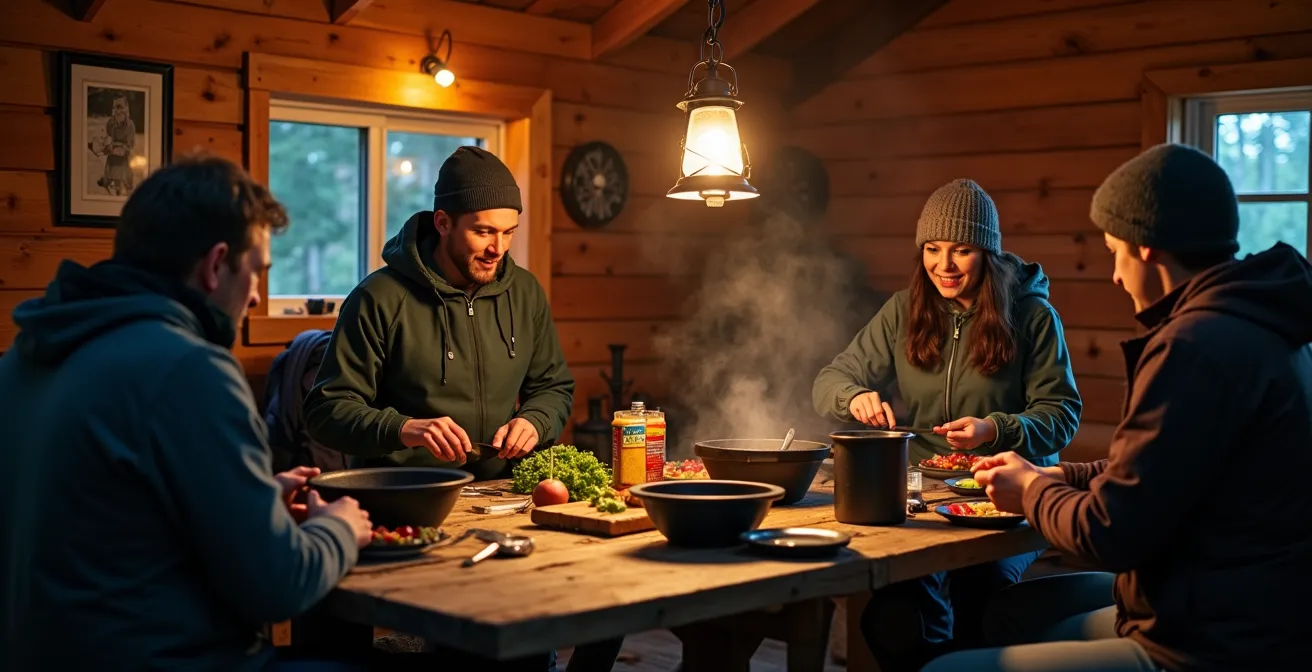
The image of a cozy, communal dinner is only possible when everyone contributes. This spirit of cooperation is the lifeblood of the hut system. It means taking the initiative to help, not waiting to be asked. Seeing that the water buckets are low is a cue to organize a party to fetch more, not a problem for someone else to solve.
Case Study: The 5040 Peak Hut’s Communal System
The ACC Vancouver Island’s 5040 Peak Hut provides a clear example of this shared responsibility. A checklist posted on the back of the door outlines mandatory tasks for departing guests. These include collecting fresh water or melting snow to leave the main buckets full for the next arrivals and refilling the wood pellet hopper for the stove. The hut custodian sleeps in a separate loft but shares the kitchen, requiring seamless coordination and communication among all occupants to ensure everyone can prepare meals and clean up efficiently.
Embracing this mindset of shared ownership is non-negotiable. It means packing out everything you pack in, cleaning up messes that aren’t yours, and always leaving the hut in a better state than you found it. This ethos of backcountry citizenship is what makes the ACC hut network a sustainable and cherished resource for all members.
Dehydrated vs. Fresh: Meal Planning for 3 Days in a Hut with No Fridge
Meal planning is a critical link in the logistical chain that directly impacts your pack weight, energy levels, and overall enjoyment. In a backcountry hut with no refrigeration, every gram counts. While a small amount of fresh food can be a huge morale booster on the first night (think a sturdy vegetable like a bell pepper or a hard cheese), your strategy for a multi-day trip must be built around lightweight, calorie-dense, non-perishable foods. This is where high-quality dehydrated and freeze-dried meals become your best friend.
When selecting meals, look beyond the price tag and focus on two key metrics: calories-per-gram and nutritional content. A long day of hiking in the mountains can burn thousands of calories, and you need to replenish that energy effectively. Look for meals that provide a good balance of carbohydrates, protein, and fat. Modern backcountry food has come a long way; many Canadian companies produce delicious, high-performance meals that are a world away from the bland mush of the past. For instance, some Canadian-made Happy Yak meals pack nearly 800 calories per 175g serving, offering an excellent weight-to-energy ratio.
A smart meal plan includes more than just dinners. Plan for high-energy breakfasts (oatmeal with nuts and dried fruit is a classic for a reason), pack-and-eat lunches (tortillas with peanut butter or salami), and plenty of high-calorie snacks (nuts, energy bars, chocolate) to fuel you throughout the day. Repackage everything to minimize bulk and waste. Remove cardboard boxes and transfer items into reusable bags. Your goal is a food system that is efficient, lightweight, and leaves absolutely no trace.
The following table provides a starting point for exploring some of the excellent dehydrated meal options made right here in Canada, helping you make an informed choice based on your specific needs and preferences for your next hut trip.
| Brand | Origin | Weight per Meal | Specialty | Price (CAD) |
|---|---|---|---|---|
| Happy Yak | Quebec, Canada | 175g | 800 cal high-protein | $11.99 |
| Backcountry Wok | Vancouver, Canada | 160g | Compostable packaging | $11.99 |
| Yamnuska Kitchen | Alberta, Canada | 180g | Rocky Mountain recipes | $12.49 |
Skis or Snowshoes: How to Access Backcountry Huts safely in Winter?
A winter booking adds a significant layer of complexity and risk to your logistical chain. Accessing an ACC hut when the landscape is buried under snow is not just a matter of choosing between skis and snowshoes; it’s an exercise in avalanche safety and deep respect for the power of the mountain winter. This is arguably the most critical link in the chain, where a mistake can have the most severe consequences. Your mode of travel—be it touring skis, splitboard, or snowshoes—is secondary to your knowledge of how to navigate avalanche terrain safely.
Before even considering a winter hut trip, completing an Avalanche Skills Training 1 (AST 1) course is non-negotiable. This course provides the foundational knowledge for understanding avalanche forecasts, identifying hazardous terrain, and performing a companion rescue. Every member of your party must be equipped with, and proficient in using, the holy trinity of avalanche safety gear: a digital transceiver (beacon), a probe, and a shovel. These are not optional accessories; they are essential life-saving tools.

The choice between skis and snowshoes often depends on the specific terrain and your personal skill level. Skis or a splitboard are generally more efficient for covering distance and are far superior for the descent. Snowshoes can be a good option for shorter, steeper approaches through dense trees. Regardless of your choice, the safety protocols remain the same. The stark beauty of a winter approach is matched only by its inherent risk, a fact reinforced by the highest authorities in Canadian mountain safety.
The route to Asulkan Cabin during the winter crosses numerous avalanche paths. Winter travellers should be equipped with avalanche beacons and be knowledgeable in their use.
– Parks Canada, Glacier National Park – Huts and Cabins
This warning underscores the gravity of winter travel. The responsibility for your safety rests entirely on you and your group. This involves meticulous planning, daily forecast checks, and the humility to turn back when conditions are unsafe. For complex routes, hiring an ACMG-certified guide is the wisest investment you can make.
Your Action Plan: Winter Hut Access Safety Checklist
- Complete an AST 1 (Avalanche Skills Training) course before attempting winter hut access.
- Check the daily avalanche forecast at avalanche.ca or call (250) 837-MTNS for Rogers Pass conditions.
- Carry mandatory avalanche safety gear: beacon, probe, and shovel for all party members.
- Verify route conditions with the ACC at 403-678-3200 before departure.
- Consider hiring an ACMG certified guide for complex approaches like the Sapphire Col, which require mountaineering skills.
Outhouses and Barrels: How to Handle Human Waste and Trash at High Altitude?
Waste management in the alpine is a critical and often overlooked aspect of backcountry citizenship. In these fragile, high-altitude environments, nothing disappears. Every piece of trash, every food scrap, and yes, all human waste, must be managed with extreme care. How a group handles its waste is a direct reflection of its respect for the mountains and for the future visitors who will share that space. It’s a fundamental responsibility that is core to the “pack it in, pack it out” ethos.
Most ACC huts are equipped with outhouses or barrel systems for solid human waste. It’s crucial to use these facilities exactly as instructed. Some modern systems are surprisingly sophisticated, designed to minimize environmental impact. Your responsibility is to keep them clean and use them correctly. This includes packing out your own toilet paper and any sanitary products, as these should never be left in a backcountry toilet. And remember, hut custodians are there to facilitate and advise, but they are not a cleaning service; every guest is responsible for their own impact.
Case Study: 5040 Peak Hut’s Innovative Waste System
The ACC’s 5040 Peak Hut on Vancouver Island showcases a significant advancement in backcountry waste management. It features the network’s first urine/solid separating toilet system. By diverting urine, the weight and volume of the solid waste are dramatically reduced, making the periodic removal by helicopter much easier and more efficient. This innovative, low-odour, waterless system represents a major step forward in minimizing the environmental footprint of human presence at its 1350m elevation.
Beyond the outhouse, you must be prepared to pack out 100% of your garbage. This includes all food packaging, wrappers, and even “organic” waste like fruit peels or coffee grounds. These items do not decompose quickly in the alpine and can attract wildlife, creating dangerous human-animal encounters. The best practice is to bring a dedicated, durable “trash bag” and compress your garbage as much as possible. In some sensitive National Park areas, regulations are even stricter, requiring you to pack out all human waste using WAG bags. Always check the specific rules for the park and hut you are visiting before you go.
Canmore or Banff: Which Town Base Offers Better Value for Hikers?
Choosing your base of operations is a strategic decision in your logistical chain, not just a matter of finding a bed. For access to many of the most popular ACC huts in the Rockies, the choice often comes down to Canmore or Banff. While both towns are iconic mountain hubs, they offer distinctly different value propositions for the budget-conscious hiker. The best choice depends entirely on the specific location of your hut, your transportation, and your budget.
Banff is located inside the National Park, which means once you’re there, you don’t have to worry about daily park entry fees. It also boasts the excellent Roam Transit system, which can get you to many popular trailheads without a car. However, this convenience comes at a premium. Accommodation, food, and supplies are generally more expensive, catering to a larger tourist market. While there’s a hostel in nearby Lake Louise, the ACC’s own flagship hostel, the Canmore Clubhouse, is located in Canmore.
Canmore, located just outside the Banff National Park gates, often presents a better overall value. Accommodation and groceries are typically more affordable, and there’s a wider selection of stores for last-minute supplies. However, this comes with a key hidden cost: hikers staying in Canmore must factor in the daily park entry fee every time they drive into Banff National Park to access a trailhead. This can add up quickly over a multi-day trip. Your choice of base, therefore, becomes a calculation: do the savings on accommodation and food in Canmore outweigh the daily cost and hassle of the park pass?
The following comparison breaks down the key factors to help you make a value-based decision for your pre- and post-hut stay, aligning your base camp with your overall trip strategy and budget.
| Factor | Canmore | Banff |
|---|---|---|
| ACC Hostel | Canmore Clubhouse available | No ACC hostel (Lake Louise has one) |
| Park Pass Required | Yes (adds daily cost) | Included in stay |
| Proximity to Huts | Better for Kananaskis/Spray Valley | Better for Wapta Icefield |
| Public Transit | Limited | Roam Transit system |
| Supply Shopping | More options, lower prices | Limited, tourist pricing |
The Bear Canister Rule: Where is Hanging Food No Longer Allowed?
In the Canadian Rockies, you are a visitor in grizzly bear country. Proper food storage is not just a suggestion; it’s a mandatory regulation designed to protect both you and the bears. This link in your logistical chain is about safety and conservation. In many areas, the old method of hanging a food bag from a tree is no longer considered sufficient or legal. Habituated bears have learned to defeat even the most elaborate rope systems, making hard-sided, bear-resistant food containers (bear canisters) the required standard.
Parks Canada has implemented strict rules for backcountry travel in Banff, Yoho, Kootenay, and Jasper national parks. It is critical to know and follow these rules precisely. Failure to do so can result in significant fines and, more importantly, create dangerous situations that can lead to a bear being relocated or destroyed. The responsibility to keep wildlife wild rests on every single backcountry user. This means storing all food, garbage, and scented items (like toothpaste and sunscreen) in an approved container or designated cable/locker system.
The regulations are time-sensitive and location-specific. For example, in the major mountain parks, bear-resistant food containers are mandatory from April 1 to November 15 for anyone camping in the backcountry. While hut users store their food inside the hut, this rule is crucial to understand for your approach and for any trips where you might be tenting. You must use a canister approved by the Interagency Grizzly Bear Committee (IGBC). These are available for rent or purchase at most outdoor stores in towns like Banff and Canmore.
Even when using a canister, it’s wise to store it at least 100 metres downwind from your sleeping area. Never cook or eat near your tent, and never bring food inside it. The goal is to create a clean, scent-free camp that offers no food reward to a curious bear. Mastering these protocols is an essential skill for any responsible travel in the Canadian wilderness.
Key Takeaways
- Mastering the ACC booking requires a holistic strategy, treating the booking as the final exam of your preparation.
- Your physical fitness for the specific hut approach is the first and most important qualification for booking.
- Adopting an ethos of “backcountry citizenship”—shared chores, meticulous cleaning, and respecting others—is mandatory.
Do You Need Extra Health Insurance for Backcountry Rescue in Canada?
The final, and perhaps most overlooked, link in the logistical chain is ensuring you are financially covered for a worst-case scenario. When you venture into the Canadian backcountry, you are accepting a degree of personal risk. While nobody plans to get injured, accidents happen. Understanding how a backcountry rescue is initiated and, more importantly, who pays for it, is a critical piece of responsible trip planning. The answer is complex and varies significantly based on your location and residency.
If you require a rescue within a National Park (like Banff, Jasper, or Glacier), the search and rescue operation itself is generally covered by your park entry pass. Parks Canada’s highly skilled visitor safety teams perform these rescues as a public service. However, this coverage ends the moment you are delivered to a trailhead or ambulance. Any subsequent medical costs, including the ambulance ride and all hospital expenses, are your own responsibility. For Canadian residents, these costs are typically covered by their provincial health plan, but it’s crucial to verify out-of-province coverage before you travel.
The situation is different for rescues outside of National Parks (e.g., in Provincial Parks or on Crown land), where costs can sometimes be billed back to the rescued party. For international visitors, the stakes are even higher. Without comprehensive travel insurance that explicitly covers backcountry hiking or mountaineering, a medical emergency in the mountains could lead to catastrophic financial consequences. With over 10,000 members accessing 32 backcountry huts, the Alpine Club of Canada community is vast, and ensuring every member is prepared is paramount.
Before any trip, you must perform an insurance audit. This is not the place to cut corners. A few dollars spent on the right policy can save you from a lifetime of debt. Carefully review your existing plans and purchase supplemental coverage if there are any gaps. This is the final step in building a truly resilient backcountry strategy.
- Verify your provincial health coverage for out-of-province emergencies.
- Check if your travel or credit card insurance explicitly covers “backcountry hiking,” “ski touring,” or “mountaineering.” Many standard policies have exclusions for these activities.
- Consider purchasing the ACC’s recommended cancellation insurance for hut bookings to protect your investment.
- Understand that a Parks Canada rescue covers the search, not the subsequent ambulance or hospital costs.
- International visitors must obtain comprehensive travel insurance that specifically includes mountain and wilderness activities.
By shifting your perspective from the booking lottery to this comprehensive logistical framework, you are no longer just a hopeful participant; you are a strategist. Your journey to an ACC hut begins now, with the first training hike, the first gear purchase, and the first careful reading of an insurance policy. Begin methodically assembling each link in your chain, and when booking day arrives, you’ll be ready not just to click, but to succeed.
Frequently Asked Questions about How to Book Alpine Club of Canada Huts Before They Sell Out in Minutes?
Who is responsible for cleaning and waste management at ACC huts?
All ACC huts are user-maintained, meaning guests are responsible for keeping the hut clean. Custodians are present to answer questions but are not responsible for cleaning up after guests.
What supplies are provided for sanitation at the huts?
Most huts provide basic cleaning supplies, but guests should bring their own toilet paper, hand sanitizer, and disinfecting supplies as recommended.
Are there specific waste regulations in National Parks?
Yes, some areas require pack-it-all-out policies including human waste via WAG bags, especially in sensitive alpine environments. Check specific park regulations before your trip.