The “best” direction to drive the Cabot Trail isn’t a fixed rule; it’s a dynamic, daily decision based on road conditions, traffic, and weather.
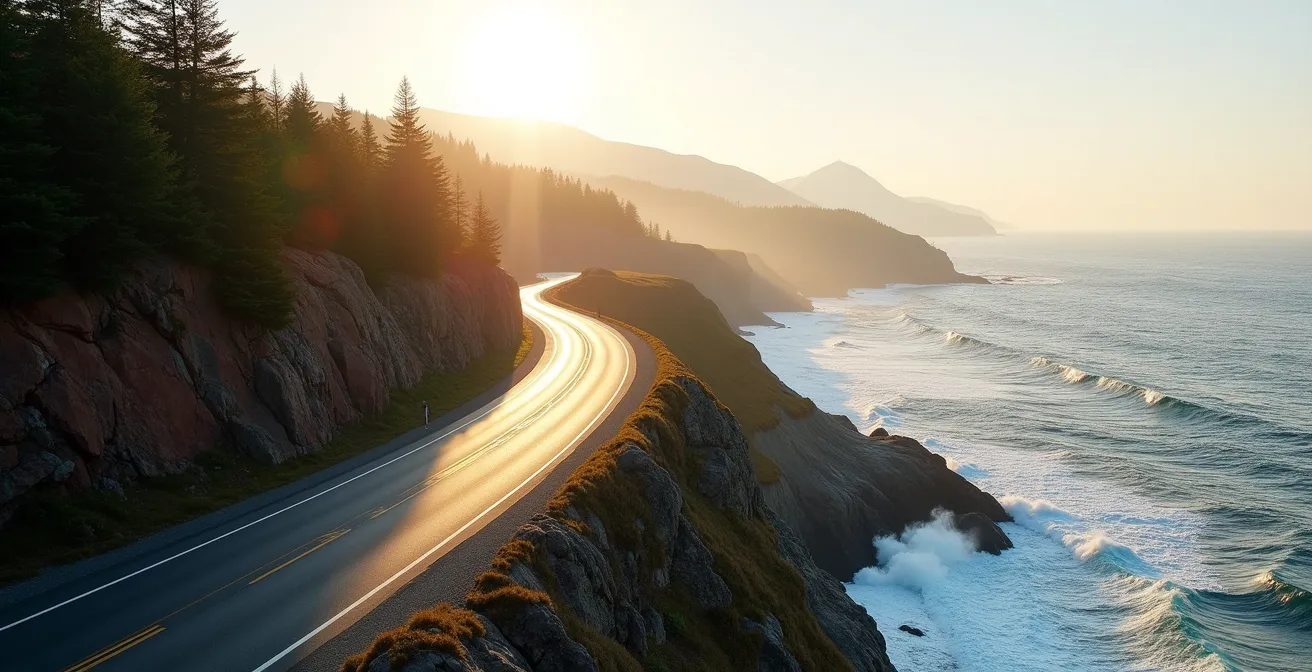
- Counter-clockwise offers superior, unobstructed ocean views but places you on the outside lane of cliff-side drops.
- Clockwise provides a greater sense of security on steep descents but often places the best coastal views on the passenger’s side.
Recommendation: Instead of committing to one direction for your whole trip, check the morning weather and traffic reports. Start your day by driving towards the clearest skies to maximize visibility and photo opportunities.
Every road tripper planning a journey to Cape Breton Island grapples with the same classic question: should you drive the legendary Cabot Trail clockwise or counter-clockwise? Online forums and generic travel guides offer a deceptively simple answer. They’ll tell you that photographers and view-seekers should go counter-clockwise for the unimpeded ocean vistas, while nervous drivers or those in large RVs should opt for the clockwise route to hug the inside lane on steep mountain descents. This advice isn’t wrong, but it’s incomplete. It treats the decision as a one-time choice based on your personality, not a strategic tool to optimize your experience.
As someone who has guided countless trips along these curves, I can tell you the real expert’s approach is far more fluid. The Cabot Trail isn’t a passive experience; it’s an active dialogue between you, your vehicle, and the wild coastal environment. The best direction is not a permanent rule but a tactical choice you should re-evaluate each morning. Factors like cruise ship schedules, seasonal road work, and the notoriously fickle maritime weather play a far greater role in the quality of your drive than a pre-set directional bias. This guide is built on that principle of a dynamic itinerary. We’ll move beyond the basic debate to give you the strategies you need to manage steep grades, avoid traffic jams, and make the most of every moment on one of Canada’s most iconic drives.
To start, it’s essential to understand the fundamental trade-offs. The choice of direction directly impacts your views, your position on the road during challenging sections, and the ease of accessing scenic look-offs. This table breaks down the core differences:
| Direction | Advantages | Best For | Challenges |
|---|---|---|---|
| Clockwise | Inside lane on mountain descents, easier for RVs on grades | Nervous drivers, those afraid of heights, RV travelers | Ocean views on passenger side |
| Counter-Clockwise | Ocean-side lane for best views, easier lookout access | Photographers, scenic drivers, most tourists | Outside lane on cliff edges |
However, the real art is using this information in combination with daily conditions. A foggy morning on the east coast might be the perfect reason to drive clockwise toward the sunnier western shore, saving the eastern views for another day. This is the essence of a weather-based routing strategy.
This guide will equip you with the knowledge to make those daily strategic decisions. We’ll cover everything from the critical mistake of a one-day trip to the practicalities of winter driving on some of Canada’s other formidable mountain roads, ensuring you’re prepared for any challenge.
Table of Contents: A Strategic Guide to Canada’s Iconic Drives
- Why Doing the Cabot Trail in One Day is a Mistake
- The North Mountain Descent: How to Save Your Brakes on Steep Grades?
- Moose Encounters: What to Do If You See a Moose on the Skyline Boardwalk?
- Baddeck or Ingonish: Where Should You Base Yourself for the Trail?
- Road Work Season: How to Check for Delays on the Cabot Trail Before You Start?
- Why Leaving at 6 AM is Crucial for the Cabot Trail in July?
- The Coquihalla Highway: Why You Need Chains or Winter Tires to Reach Big White?
- How to Drive the Icefields Parkway Safely Before the Gates Close?
Why Doing the Cabot Trail in One Day is a Mistake
The most common error first-time visitors make is underestimating the Cabot Trail. They look at the 298-kilometre loop, do some quick math, and budget a single day for the drive. While technically possible, this approach turns a world-class scenic journey into a frantic, stressful race against the clock. According to Roadtripper Canada, the bare minimum driving time is 4 hours without any stops. Factoring in even a handful of the dozens of stunning look-offs, a short hike, a lunch break, and photo opportunities will easily push your day to 8-10 hours, leaving you exhausted and feeling like you missed everything.
Rushing the trail means you’re only seeing it through a windshield. You miss the immersive experiences that define Cape Breton: the rich Acadian culture of Chéticamp, the haunting beauty of the Skyline Trail at sunset, or the spontaneous fiddle music that might erupt at a pub in Margaree. A one-day trip forces you to skip entire sections and make painful choices, like choosing between a whale watching tour and exploring the artisan shops that dot the western coast. It completely removes your ability to be flexible and adapt to the weather—a key strategy for a successful trip.
To truly experience the Cabot Trail, you need a minimum of two days, though three is ideal. This slower pace transforms the journey from a checklist of viewpoints into a genuine exploration. It allows you to base yourself in a town like Ingonish or Chéticamp and explore in a more relaxed manner, giving you time for longer hikes, leisurely meals, and the freedom to wait out a passing rain shower. A multi-day itinerary allows the trail to reveal its secrets at its own pace, which is the only way to truly appreciate it.
The North Mountain Descent: How to Save Your Brakes on Steep Grades?
Whether you’re driving clockwise or counter-clockwise, you will face formidable mountain grades on the Cabot Trail. The most notorious of these are the descents from Cape Smokey and North Mountain, which feature sustained grades of 12-15%. For drivers unaccustomed to mountain roads, the instinct is to “ride the brakes”—maintaining constant, light pressure to control speed. This is the single most dangerous thing you can do. It can quickly lead to brake fade, a terrifying situation where your brakes overheat and lose their stopping power entirely.
The key to a safe descent is proper brake management, which means letting your engine do the majority of the work. This technique, known as engine braking, is simple. Before you even start the descent, shift your automatic transmission into a lower gear, typically marked as ‘L’ (Low), ‘2’, or ‘1’. If your vehicle has paddle shifters or a manual mode, downshift to keep the engine’s RPMs between 2500-3000. You’ll hear the engine get louder—that’s a good sign. It means the engine’s compression is slowing the car, not your brake pads.
Your brakes should only be used intermittently. Apply firm pressure for a few seconds to reduce your speed, then release your foot completely to allow them to cool. Repeat this process as needed. The steepness of these grades is no exaggeration; the challenge of Cape Smokey involves a 366-meter change in elevation over a very short distance. If at any point you smell a hot, burning scent, that’s your brakes overheating. Pull over at the very next designated lookout or safe pull-off area and let the vehicle sit for at least 20-30 minutes to allow the brakes to cool down completely before proceeding.
Case Study: The Cape Smokey Grade Challenge
Cape Smokey features a 12-15% grade over 2.5km, climbing to 366 meters above sea level. Counter-clockwise drivers face this as a steep descent requiring careful brake management, while clockwise drivers tackle it as an uphill climb that’s easier on the vehicle but requires full throttle in lower gears. This highlights how your chosen direction directly impacts the mechanical demands on your vehicle.
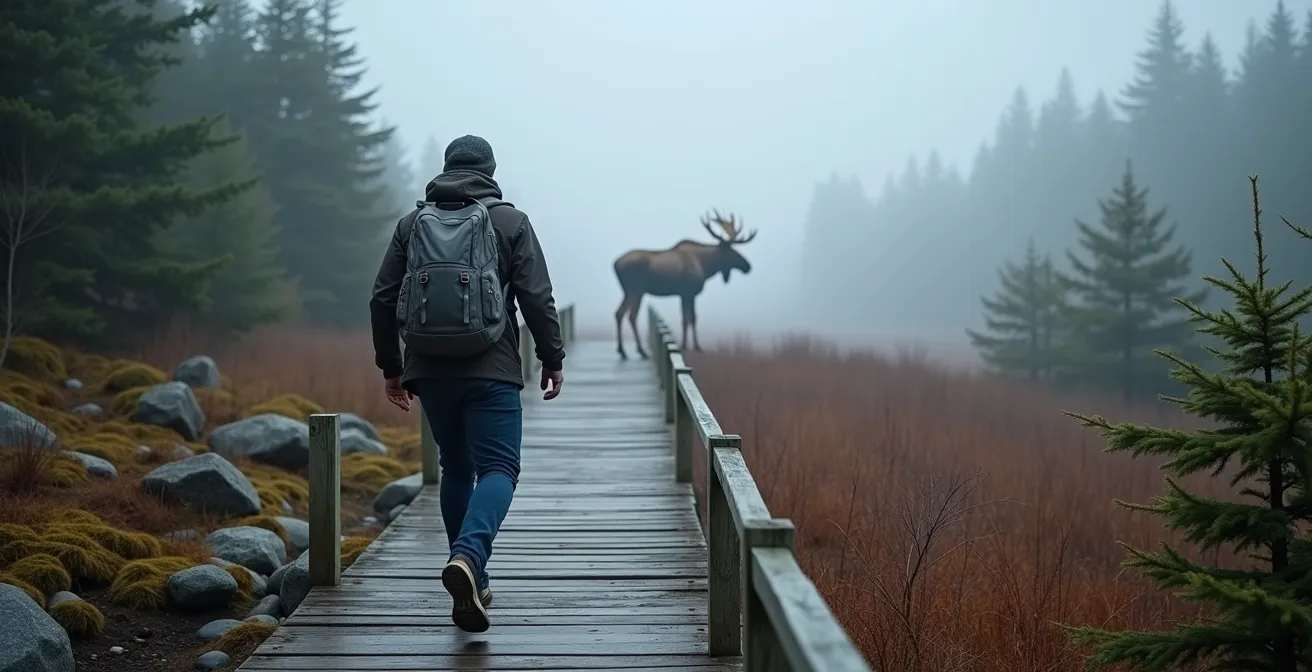
Moose Encounters: What to Do If You See a Moose on the Skyline Boardwalk?
Spotting a moose is a highlight for many visitors to Cape Breton Highlands National Park, and the Skyline Trail is one of the most popular places for an encounter. However, it’s crucial to remember that these are massive, powerful wild animals, not roadside attractions. An adult bull moose can weigh over 500 kg and stand two meters tall at the shoulder. While they are generally not aggressive, they can become dangerous if they feel threatened, especially a cow protecting her calf.
If you encounter a moose on the trail or the iconic boardwalk, your first and only priority is safety. Never approach a moose. The recommended safe distance is at least 30 meters (about three bus lengths). Do not try to get a closer photo. Stop immediately and assess the situation. If the moose is on the trail ahead, do not try to walk around it. Back away slowly and quietly the way you came. Speak in a calm, low voice to let it know you are there and are not a threat. Never, ever get between a mother moose and her calf.
Pay close attention to the animal’s body language. Signs of agitation include its ears being pinned back, the long hairs on its neck (hump) standing up, and licking its lips. If you see any of these warning signs, it means the moose is stressed and may charge. You must increase your distance immediately. On the road, slow down as soon as you spot one and be prepared to stop. Moose are unpredictable and may dart into your path without warning. Your respect for their space is essential for both your safety and their well-being.
Action Plan: Moose Encounter Response Protocol
- Stop and Assess: Halt your movement immediately on the trail or slow your vehicle on the road. Do not make sudden movements.
- Maintain Distance: Ensure you are at least 30 meters away. If a moose approaches you, back away slowly. Never turn your back and run.
- Watch for Warning Signs: Look for pinned-back ears, raised hair on the neck, or lip-licking. These indicate agitation and a potential charge.
- Provide an Escape Route: Never corner a moose or block its path of travel, especially between a cow and her calf.
- Report Concerns: If you encounter an aggressive or overly habituated moose that shows no fear of people, report its behavior and location to Parks Canada at 1-888-773-8888.
Baddeck or Ingonish: Where Should You Base Yourself for the Trail?
Choosing your home base is one of the most important strategic decisions for a multi-day Cabot Trail trip. Your choice of town will define the rhythm of your days, your driving times, and the type of attractions at your doorstep. The three main contenders are Baddeck, Ingonish, and Chéticamp, each offering a distinct advantage.
Baddeck is often called the “beginning and end” of the trail. As a larger village, it has more services, restaurants, and accommodation options. Its central location on the Bras d’Or Lake makes it a good base for exploring the wider Cape Breton area. However, its main drawback is its distance from the most spectacular northern sections of the trail. Staying in Baddeck means adding 1-2 hours of driving each day just to get to and from the Cape Breton Highlands National Park entrance.
Ingonish, on the eastern side, and Chéticamp, on the western side, are located right at the gateways to the park. Staying in one of these towns puts you directly in the heart of the action. Ingonish is ideal for hikers wanting to tackle the Middle Head Trail and for those who love sandy beaches. Chéticamp is the vibrant center of Acadian culture, offering fantastic sunsets and the closest access to the famous Skyline Trail. The primary challenge with these locations is the high demand for accommodation. In peak season, rooms are often booked out many months in advance.
Case Study: Peak Season Accommodation Reality in Cape Breton
Tourism Nova Scotia data shows that prime accommodations in Ingonish and Chéticamp for July, August, and the October Celtic Colours festival are often fully booked 6-9 months in advance. Experienced travelers often secure their summer reservations as soon as booking opens the previous autumn. This illustrates the necessity of long-term planning for anyone wanting to stay within the park’s prime access points.
The choice ultimately depends on your priorities. Below is a comparison to help you decide which base best suits your travel style.
| Location | Distance to Trail | Best For | Key Attractions |
|---|---|---|---|
| Baddeck | Gateway position, adds 1-2 hours daily driving | History buffs, late arrivals | Alexander Graham Bell Museum, Celtic music venues |
| Ingonish | Inside the park, immediate trail access | Hikers, beach lovers | Keltic Lodge, Middle Head Trail, beaches |
| Chéticamp | Western gateway, sunset views | Photographers, culture seekers | Acadian culture, Skyline Trail access, whale watching |
Road Work Season: How to Check for Delays on the Cabot Trail Before You Start?
The Cabot Trail is a lifeline for many communities and a vital piece of tourism infrastructure. As such, it is under near-constant maintenance, especially during the short summer and fall construction season. A single-lane closure for repaving or culvert replacement can add significant delays to your trip, disrupting your carefully planned itinerary. Ignoring the possibility of road work is a rookie mistake that can easily cost you an hour or more of valuable sightseeing time.
Fortunately, being prepared is simple. Your most essential tool is the Nova Scotia 511 service. This is the official source for real-time road conditions, construction updates, and incident reports from the provincial Department of Public Works. It is absolutely crucial to check this resource before you get in the car each morning. You can access it via the website (511.novascotia.ca) or by downloading the mobile app. Don’t rely on your car’s GPS, as it often won’t have the latest closure information.
Using the service is straightforward. Go to the map view, zoom into the Cape Breton region, and ensure the “Construction” filter is toggled on. This will show you all active work zones, including the type of delay (e.g., lane closure, full closure, or traffic control personnel). It’s also wise to check the routes leading to the trail, such as Highway 19 (the Ceilidh Trail), as a delay there can also impact your start time. The unexpected can always happen, as demonstrated by a major weather event in 2021.
Case Study: The 2021 Cabot Trail Emergency Closure
In November 2021, a historic storm washed out a critical culvert, forcing a complete closure of a section of the Cabot Trail within the national park. Parks Canada and provincial crews worked around the clock, but the closure lasted for an extended period, effectively cutting the loop. The agencies used 511 and public bulletins to provide updates, demonstrating how vital this tool is for both planned work and unforeseen emergencies. Checking it daily is a non-negotiable part of a smart travel plan.
Before you leave your hotel’s Wi-Fi, make it a habit to check the 511 map. A five-minute check can save you from a long, frustrating wait in a construction lineup, allowing you to adjust your route or departure time for a smoother, more enjoyable drive. You can even call 511 from any Nova Scotia phone for voice updates or subscribe to alerts for specific routes.
Why Leaving at 6 AM is Crucial for the Cabot Trail in July?
In the peak summer months of July and August, the Cabot Trail’s popularity becomes its biggest challenge. By 10 AM, the most famous look-offs are crowded with cars, and the trails are busy with hikers. The key to experiencing the serene, majestic beauty of the trail is simple: wake up early. A strategic 6 AM start is not just a suggestion; it’s the most effective tool for traffic evasion and creating a peaceful, superior experience.
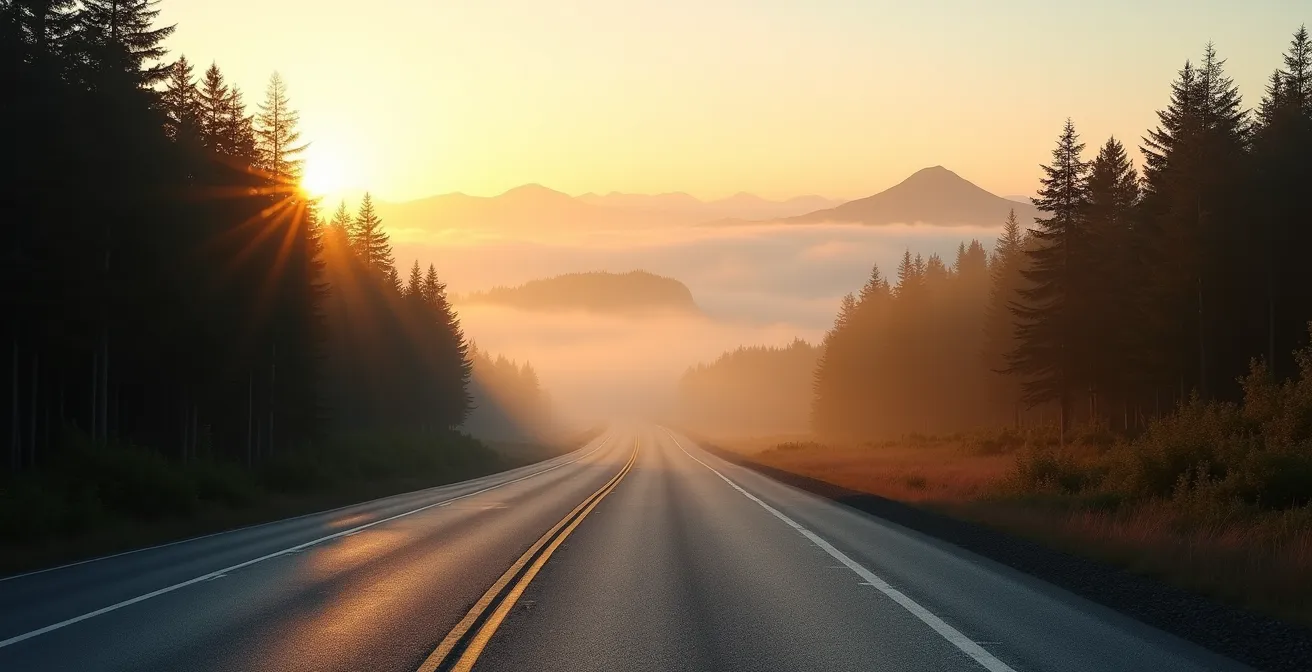
There are two main reasons for this. First, you’ll be hours ahead of the tour buses. The Port of Sydney is a busy cruise ship destination, and on days when a large ship is in dock, thousands of passengers are shuttled onto tour buses that flood the Cabot Trail. These buses typically start arriving at major attractions between 9 AM and 10 AM. By leaving at 6 AM, you give yourself a three-to-four-hour head start, allowing you to enjoy places like the Skyline Trail or the Green Cove look-off in relative solitude. You’ll be finishing your morning hike just as the main wave of crowds is arriving.
Second, dawn is a magical time in the highlands. The light is soft and golden, perfect for photography. The coastal fog often hangs in the valleys, creating a mystical, atmospheric scene. Most importantly, this is when wildlife is most active. According to Parks Canada wildlife data, moose are most active at dawn and dusk, significantly increasing your chances of a safe and memorable sighting from a distance. An early start rewards you with cooler temperatures for hiking and a profound sense of having this world-famous landscape all to yourself.
Key Takeaways for the Cabot Trail
- The best direction (clockwise/counter-clockwise) is a daily strategic choice, not a fixed rule. Adapt to weather and traffic.
- A one-day trip is a mistake. Plan for at least two, ideally three, days to truly experience the culture and scenery.
- Master engine braking on steep descents to avoid dangerous brake fade. Let your engine do the work.
- Book accommodations in prime locations like Ingonish or Chéticamp 6-9 months in advance for peak season.
- A 6 AM start is your secret weapon to avoid cruise ship tour buses and enjoy popular spots in peaceful solitude.
The Coquihalla Highway: Why You Need Chains or Winter Tires to Reach Big White?
Shifting our focus to Western Canada, driving the Coquihalla Highway (Highway 5) in winter is a serious undertaking that demands proper preparation. This high-elevation mountain pass in British Columbia is notorious for its sudden, severe weather changes and heavy snowfall. Because of these hazardous conditions, BC law mandates that all vehicles travelling on the Coquihalla between October 1st and April 30th must be equipped with proper winter tires. Failure to comply can result in a fine and being turned back by law enforcement.
What constitutes a “proper” winter tire? The law requires tires that display either the M+S (Mud and Snow) symbol or the Three-Peak Mountain Snowflake symbol. For the severe conditions frequently encountered on the Coquihalla, tires with the Three-Peak Mountain Snowflake symbol are strongly recommended as they offer superior traction in snow, ice, and cold temperatures. All-season tires, even if they have an M+S rating, may not provide adequate grip when temperatures plummet and the road becomes a sheet of ice.
For commercial vehicles, the requirements are even stricter, often mandating the carrying and use of tire chains. While not legally required for most passenger vehicles if they have proper winter tires, carrying a set of chains can be a lifesaver in an unexpected blizzard. If you are driving a rear-wheel-drive vehicle or are not experienced in winter mountain driving, having chains provides an extra layer of safety. Before heading up to a ski resort like Big White, which involves travel on these designated winter routes, checking your tires is not just a suggestion—it’s a legal and safety-critical obligation.
How to Drive the Icefields Parkway Safely Before the Gates Close?
The Icefields Parkway (Highway 93) in Alberta is arguably Canada’s most breathtaking drive, connecting Jasper and Banff National Parks. However, its beauty is matched by its remoteness. This is a road where you are truly on your own. There are no towns, very few services, and for long stretches, absolutely no cell phone reception. Parks Canada explicitly warns that large portions of the parkway have no cell service, meaning you cannot rely on your phone for navigation or emergencies. Safe travel here, especially in the shoulder seasons, is all about self-sufficiency.
Before you even think about starting your drive, a pre-departure check is essential. First and foremost, fill up your gas tank in Jasper, Lake Louise, or at the Saskatchewan River Crossing (the only gas station along the route, which has limited seasonal hours). Never start the drive with less than a full tank. Second, download offline maps of the entire region to your phone or have a physical map as a backup. Your online GPS will not work. Third, stock your vehicle with emergency supplies: extra water, food, warm clothing (even in summer), a first aid kit, and a flashlight. The weather can change in an instant, and a sudden snowstorm can close the road, leaving you stranded for hours.
Finally, be aware of the gate closures. During winter and shoulder seasons, Parks Canada will close gates at the entrance to the parkway if conditions are deemed unsafe due to heavy snow or avalanche risk. These closures can happen with little warning. Always check the Alberta 511 and Parks Canada road report websites before you depart. Trying to “beat the gates” is a dangerous gamble. A safe and enjoyable drive on the Icefields Parkway is a slow and prepared one, respecting the power of the mountains and the remoteness of the environment.
Checklist: Remote Parkway Pre-Departure Essentials
- Fuel Up: Fill your gas tank completely in the last major town (e.g., Jasper, Lake Louise) before starting.
- Download Maps: Save the entire parkway region for offline use on your GPS app. Do this while you still have Wi-Fi.
- Stock Supplies: Pack more food, water, and warm clothing than you think you’ll need. An emergency blanket is a wise addition.
- Check Conditions: Visit both the provincial 511 website and the Parks Canada road report for the latest on closures and conditions.
- Inform Someone: Let a friend or family member know your planned route and your estimated time of arrival.
Now that you’re equipped with expert strategies for Canada’s greatest drives, the next step is to start planning your own unforgettable road trip adventure.