The success of a multi-region Canadian trip hinges on mastering logistics, not just choosing destinations.
- Underestimating travel time between regions is the single most common and costly mistake. A “short drive” on the map can be a full day’s journey.
- Planning must account for dramatic climate shifts, variable provincial laws, and non-negotiable booking systems for popular attractions.
Recommendation: Shift your planning mindset from a tourist to a logistics coordinator. Prioritize realistic transit, build in buffer days, and plan for the country’s scale before booking a single hotel.
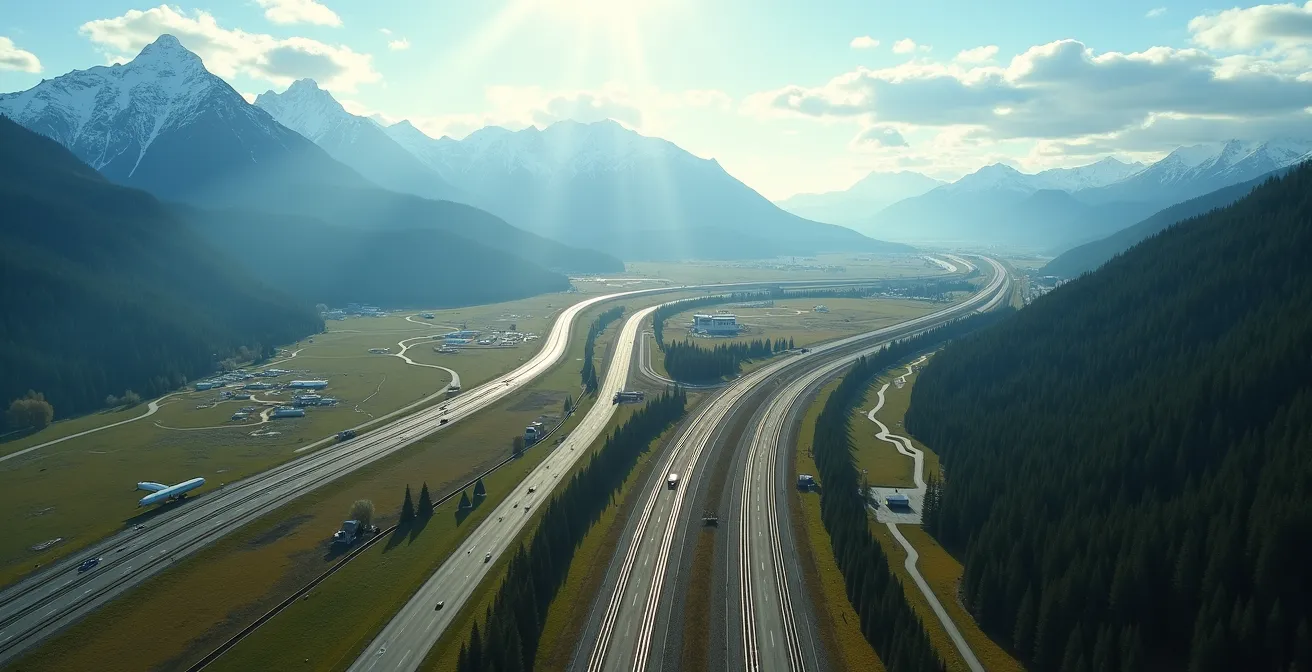
Every year, ambitious travelers arrive with a dream itinerary: a grand tour of Canada. They picture a seamless journey from the urban energy of Toronto to the majestic peaks of the Rockies, perhaps with a detour to the coastal beauty of the Maritimes. The plan seems logical on paper, mirroring a multi-country trip through Europe. This is the first, and most critical, mistake. Canada’s sheer scale is not just a trivia fact; it’s the central organizing principle of any successful trip. Ignoring it transforms a dream vacation into a logistical nightmare of missed connections, budget overruns, and days spent staring at highways instead of landscapes.
Most guides focus on what to see. They’ll list the best photo spots in Banff or the top museums in Montreal. While useful, this advice is secondary. The real key to a successful Canadian journey lies in understanding the operational reality of its geography. It’s about grasping why a cross-country drive isn’t a long weekend activity, how to pack for two different seasons in the same week, and why Google Maps’ time estimates can be dangerously misleading in places like Newfoundland. It requires treating Canada less like a country and more like a continent.
This guide takes a different approach. As a logistics coordinator, my focus isn’t on where you should go, but on *how* you get there without sacrificing your time, money, and sanity. We will dissect the common planning fallacies and replace them with a structured, realistic framework. We’ll analyze the critical time-cost-experience matrix of travel, the non-negotiable scheduling rules for key attractions, and the practicalities of preparing for a journey that spans thousands of kilometres and multiple climate zones. This is about building an itinerary that works in the real world, not just on a postcard.
To help you build a truly feasible and enjoyable itinerary, this article breaks down the essential logistical considerations. The following sections will guide you through the critical decisions and common pitfalls of planning a multi-region trip across Canada.
Summary: A Logistical Guide to Multi-Region Canadian Travel
- Why Planning a “Toronto to Vancouver” Drive in 3 Days Is a Recipe for Disaster
- Domestic Flights vs. Via Rail: Which Choice Saves You More Time and Money?
- Packing for Canada: How to Handle 25°C in Toronto and 5°C in Banff in the Same Week?
- The Scheduling Mistake That Ruins Your Visit to Niagara Falls and Banff
- When to Schedule High-Altitude Hikes: The 48-Hour Acclimatization Rule
- Radar Detectors and U-Turns: 3 Driving Laws That Change Between Provinces
- Gros Morne to St. John’s: Why This Drive Takes 7 Hours (Not 3)
- How to Prepare Your Vehicle for the 7,800 km Trans-Canada Highway Crossing?
Why Planning a “Toronto to Vancouver” Drive in 3 Days Is a Recipe for Disaster
The idea of a cross-Canada road trip is iconic, but a fundamental misunderstanding of its scale is the first itinerary-killer. A quick look at a map might suggest Toronto to Vancouver is a manageable, multi-day drive. It is not. The distance is roughly 4,400 kilometres. To cover this in three days would require driving nearly 15 hours per day, without accounting for traffic, construction, refuelling, or rest. It’s not an ambitious plan; it’s a physical impossibility that guarantees you will see nothing but asphalt.
The primary flaw in this thinking is applying a European or American interstate mindset to the Canadian landscape. Northern Ontario, for instance, features a notorious 476-kilometre stretch between Wawa and Hearst with no services. This isn’t just a lack of gas stations; it means no towns, no cell signal, and no help for hundreds of kilometres. The prairies, while flat, are subject to extreme weather and vast distances between major centres. You are not simply driving from one city to the next; you are traversing a wilderness.
A realistic drive from Toronto to Vancouver, designed for enjoyment and safety, requires a minimum of seven full days of driving, and that’s at a brisk pace. A more comfortable and scenic itinerary would allocate 10 to 14 days for the one-way journey. This allows for proper rest, exploration of places like Lake Superior Provincial Park or the prairies’ unique beauty, and buffers for unexpected delays. Treating the drive as the destination, rather than a transit leg, is essential. Anything less is a recipe for exhaustion and disappointment.
Domestic Flights vs. Via Rail: Which Choice Saves You More Time and Money?
Once you accept that driving across the country is a vacation in itself, the next logistical question is how to connect distant regions like Ontario and Alberta. The two primary contenders are domestic flights and VIA Rail’s iconic “The Canadian” train. The choice is not just about speed or cost, but about the kind of experience you want. This is the Time-Cost-Experience Matrix in action: you can usually optimize for two of the three, but rarely all three.
Flying is, without question, the most time-efficient option. A flight from Toronto to Calgary (the gateway to Banff) takes about 4.5 hours. Even adding airport transit and security time, you can cross a third of the country in less than a day. It is the pragmatic choice for travelers whose priority is to maximize time at their destinations. However, costs can fluctuate dramatically based on season and booking time.
VIA Rail, by contrast, is not transportation; it’s a land cruise. The journey from Toronto to Vancouver takes four full days. It is a scenic, relaxing experience offering a unique perspective on the country’s changing landscape. It is also significantly more expensive than flying, especially if you opt for a sleeper cabin. A critical piece of insider knowledge, as highlighted in a report on Canadian travel planning, is that freight trains have priority on most of the tracks. This means passenger trains can and often do face significant delays, making it an unreliable option if you have tight connections.
Case Study: The VIA Rail Freight Train Priority Issue
On long-haul routes through Canada, the rail lines are primarily owned by freight companies like CN and CP. Their freight trains have priority over VIA Rail’s passenger trains, which can lead to significant and unpredictable delays. A passenger train may be shunted to a siding for hours to let a long freight train pass. This operational reality means that a train’s arrival time is more of an estimate than a guarantee, making it extremely risky to book flight connections or time-sensitive activities immediately after your scheduled arrival.
The following table breaks down the core trade-offs for a Toronto-to-Vancouver journey, illustrating the stark differences in time and cost that must inform your decision.
| Mode | Duration | Cost Range | Key Consideration |
|---|---|---|---|
| Flight | 4.5 hours | $250-600 | Fastest option |
| VIA Rail | 4 days | $500-2000+ | Scenic land cruise experience |
| Driving | 45+ hours | $1000+ (gas/hotels) | 6-7 full days minimum |
| Bus | 65+ hours | $150-250 | Most economical but longest |
Packing for Canada: How to Handle 25°C in Toronto and 5°C in Banff in the Same Week?
Packing for a multi-region Canadian trip is a common point of failure. Travelers often pack for one climate, only to find themselves unprepared for the dramatic shifts between regions. It’s entirely possible to experience a humid 25°C (77°F) day in Toronto and a brisk, near-freezing 5°C (41°F) morning in the Rocky Mountains within the same week. The platitude “pack layers” is true, but it’s strategically insufficient. The expert approach is to plan for a Two-Climate Itinerary.
This means going beyond simple layering and adopting a modular system. The most effective method is the three-layer system, which allows for maximum adaptability. This consists of a moisture-wicking base layer (like merino wool), an insulating mid-layer (like a fleece or down jacket), and a waterproof/windproof outer shell. With these three pieces, you can handle everything from a cool evening in Quebec City to a windy hike in Banff.
To manage this effectively, consider using packing cubes to create a “City Cube” for urban environments (Toronto, Montreal) and a “Mountain/Adventure Cube” for wilderness areas (Banff, Gros Morne). This prevents you from having to unpack your entire suitcase for a single cold-weather hike. Furthermore, smart travelers leverage local resources. Bulky items like bear spray or specialized hiking poles can be rented at outdoor stores like MEC in Calgary or Vancouver, saving precious luggage space and weight. For souvenirs or clothes you no longer need, the Canada Post Flat Rate Box is an excellent hack to ship items home or to your next major city, avoiding excess baggage fees on domestic flights.
The Scheduling Mistake That Ruins Your Visit to Niagara Falls and Banff
After tackling the macro-logistics of transport and packing, the next level of planning involves micro-logistics: daily timing. Many travelers successfully arrive at their destination only to have their experience compromised by poor scheduling. This is especially true at world-famous attractions like Niagara Falls and the iconic lakes of Banff National Park, where timing is everything.
Let’s take Niagara Falls. A common plan is to land at Toronto Pearson Airport (YYZ), pick up a rental car, and drive straight to the falls. The map shows a 90-minute drive. The reality is far different. As one travel guide notes, while it is a 90-minute drive from YYZ in ideal conditions, you must factor in at least one hour to deplane and clear customs, another hour for the rental car process, and the high probability of traffic on the Queen Elizabeth Way (QEW). That 90-minute drive easily becomes a 4-hour ordeal. Arriving at 2 PM on a July afternoon means you will be met with massive crowds, turning a majestic experience into a frustrating shuffle.
The situation is even more acute in the Rockies. The road to the iconic Moraine Lake, for example, is now closed to personal vehicles for most of the day due to overwhelming demand. Arriving after 6 AM means you will be turned away. Access is only possible via a Parks Canada shuttle, which must be booked weeks, if not months, in advance. Missing this critical piece of information means you simply will not see the lake.
Case Study: Peak Season Crowd Management at Canadian Attractions
The operational reality at Canada’s top natural attractions has changed. At Moraine Lake, arriving after the early morning hours means the access road is closed, forcing visitors to rely on the mandatory Parks Canada shuttle system, which requires advance booking. Similarly, at Niagara Falls, arriving mid-day in peak season results in overwhelming crowds that diminish the experience. The logistical solution is twofold: travel during the shoulder seasons (June or September) for fewer crowds, and for any peak season visit, plan to be at popular locations at sunrise or explore equally stunning but less famous alternatives, like Emerald Lake instead of Lake Louise.
When to Schedule High-Altitude Hikes: The 48-Hour Acclimatization Rule
A particularly dangerous logistical oversight for those visiting the Canadian Rockies is ignoring the need for high-altitude acclimatization. Flying from a sea-level city like Toronto or Vancouver and immediately attempting a strenuous high-altitude hike is a serious health risk. The town of Banff sits at 1,383 metres (4,537 ft), and many popular trailheads, like the one for Sentinel Pass, start much higher. The thinner air can lead to altitude sickness, with symptoms ranging from headaches and nausea to more severe complications.
To mitigate this, you must schedule an Acclimatization Buffer into your itinerary. The golden rule is to allow your body 48 hours to adjust before engaging in any high-exertion activity at high altitudes. This doesn’t mean wasting two days. It means structuring your schedule intelligently. Spend your first two days in the Rockies enjoying lower-altitude activities. Explore the Banff townsite, walk the gentle trails along the Bow River, or visit Johnston Canyon. These activities are beautiful and rewarding but keep you at a lower, safer elevation.
On day three and beyond, your body will be better prepared to tackle the more demanding high-altitude trails like the Plain of Six Glaciers or Wilcox Pass. During this initial 48-hour period, it’s also crucial to drink significantly more water than usual and avoid heavy meals and alcohol, which can exacerbate the effects of altitude. It’s important to note that while medications like Diamox can help, they require a doctor’s prescription in Canada and are not available over the counter. Planning for acclimatization is a non-negotiable part of a safe and enjoyable mountain itinerary.
Action Plan: 48-Hour Acclimatization Protocol for the Canadian Rockies
- Days 1-2: Schedule only lower-altitude activities. Good options include exploring the Banff townsite (1,383m), visiting Lake Minnewanka, or hiking Johnston Canyon.
- Day 3 and beyond: Plan your strenuous, high-altitude hikes like Sentinel Pass or the Plain of Six Glaciers for after the initial acclimatization period.
- Hydration Protocol: Consciously drink excessive amounts of water during your first 48 hours in the mountains to help your body adjust.
- Dietary Caution: Avoid heavy meals and alcohol for the first 24 hours, as they can worsen symptoms of altitude sickness.
- Symptom Awareness: Know the early signs of altitude sickness (headache, nausea, dizziness, fatigue) and be prepared to descend if they worsen.
Radar Detectors and U-Turns: 3 Driving Laws That Change Between Provinces
For those undertaking a road trip portion of their Canadian tour, it’s critical to recognize that you are not driving in a single, legally homogenous country. You are crossing Provincial Legal Borders. Each province has its own set of traffic laws, and ignorance is not a valid defense. What is perfectly legal in one province can result in a hefty fine and demerit points in another.
One of the most common pitfalls for visitors, especially from the US, is the use of radar detectors. These devices are illegal to own or use in the vast majority of Canadian provinces, including Manitoba, Ontario, Quebec, and all of the Atlantic provinces. Being caught with one can lead to its confiscation and significant fines. Another major difference is the rule for turning right on a red light. While permitted in most of Canada (after a complete stop), it is strictly illegal on the Island of Montreal. This single exception catches countless drivers by surprise.

Winter tire regulations are another critical area of variation. In British Columbia, winter tires or chains are mandatory on most highways from October 1st to April 30th. In Quebec, all passenger vehicles must be equipped with winter tires from December 1st to March 15th. Driving without them during these periods will result in fines. These are not mere suggestions; they are legal requirements enforced by law enforcement. Before crossing a provincial border, a quick 10-minute search of the destination province’s key driving laws is a vital part of your travel logistics.
This table highlights some of the key legal differences a driver will encounter when crossing provincial lines.
| Law | Province/Region | Regulation | Fine/Penalty |
|---|---|---|---|
| Winter Tires | B.C. highways | Mandatory Oct 1 – Apr 30 | $121 fine |
| Winter Tires | Quebec | Mandatory Dec 1 – Mar 15 | $200-300 fine |
| Right Turn on Red | Island of Montreal | Completely illegal | $100-200 fine |
| Radar Detectors | Most provinces | Illegal to own or use | Hefty fines + demerit points |
Gros Morne to St. John’s: Why This Drive Takes 7 Hours (Not 3)
Nowhere is the concept of a “Geographic Reality Check” more apparent than in Newfoundland. A traveler looking at a map of the island might plan to drive from the west coast wonder of Gros Morne National Park to the historic capital of St. John’s on the east coast, see the distance is roughly 700 km, and budget half a day. This would be a grave miscalculation. That drive is a full 7 to 8-hour journey, and that’s without significant stops.
The reason for this discrepancy is the nature of the Trans-Canada Highway in the province. Unlike the multi-lane superhighways found in Southern Ontario or near major cities, the Newfoundland TCH is often a two-lane road that winds through rugged, remote terrain with significant elevation changes. Speed limits are lower, and passing opportunities can be infrequent. Furthermore, as a detailed guide to Canadian road trips points out, you have to account for mandatory stops for gas in sparsely populated areas and the very high probability of encountering moose on the road, especially at dawn and dusk. A collision with a moose is not only catastrophic for the vehicle but is also a leading cause of highway fatalities in the province.
This is where smart logistical planning can turn a long, stressful transit day into a valuable part of the trip. Instead of attempting the drive in one go, a savvy traveler will break the journey. An overnight stay in a central town like Gander provides a much-needed rest and an opportunity to explore the town’s unique and fascinating aviation history, directly linked to its strategic location. This approach transforms the trip from a grueling marathon into two manageable drives, adding another layer to the Newfoundland experience.
Case Study: The Newfoundland Driving Reality Check
The 700 km drive from Gros Morne to St. John’s is a classic example of where map distance belies travel time. The route is primarily a two-lane highway with lower speed limits, winding sections, and the constant, serious risk of moose on the roadway. Instead of a single, exhausting 7+ hour push, the strategic solution is to break the journey with an overnight stay in Gander. This not only improves safety and reduces driver fatigue but also allows travelers to visit the Gander Aviation Museum and experience a key piece of transatlantic history, turning a long transit day into a memorable part of the itinerary.
Key Takeaways
- Canada’s scale is the single most important factor in trip planning; underestimating it leads to logistical failure.
- Transportation choices (fly, train, drive) must be weighed on a Time-Cost-Experience matrix, as you can rarely optimize for all three.
- Successful planning requires accounting for variable logistics like multi-climate packing, provincial law differences, and mandatory acclimatization periods.
How to Prepare Your Vehicle for the 7,800 km Trans-Canada Highway Crossing?
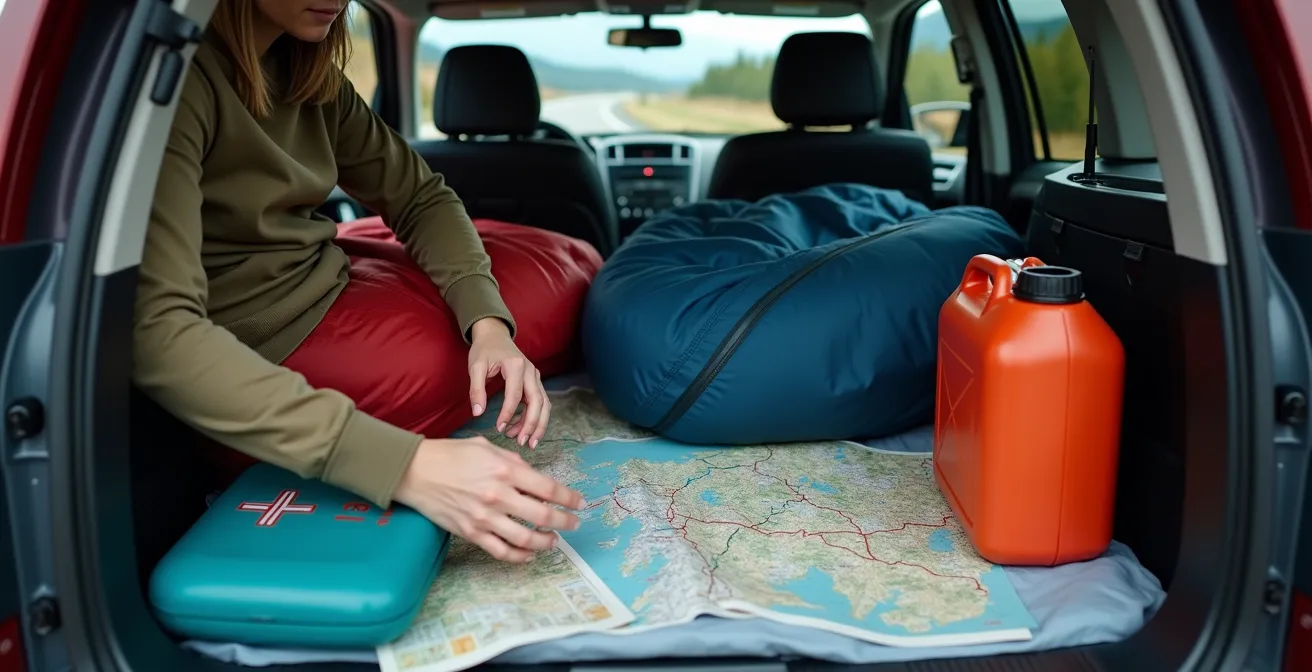
For the truly ambitious traveler undertaking the full 7,800-kilometre Trans-Canada Highway crossing, vehicle preparation moves from a suggestion to a matter of survival. This is not a typical road trip; it is an expedition that crosses vast stretches of wilderness with limited services. Relying on a standard rental car and a smartphone is an inadequate and risky strategy. Proper preparation is your primary safety net.
First, the essentials. Ensure your vehicle has a full-size spare tire, not a temporary “donut,” and that you know how to change it. A flat tire in Northern Ontario is not a minor inconvenience; it can be a trip-ending event if you are unprepared. Carry a portable tire inflator and a battery booster pack. Next, communication: large portions of the Trans-Canada have no cell service. A satellite messenger, like a Garmin inReach, is an essential piece of safety equipment. It allows you to call for help even when you are completely off the grid. As a backup to digital navigation, always carry a physical road atlas, such as the detailed Backroad Mapbooks series.
Fuel and resource management are also critical. A jerrycan with extra fuel is mandatory before crossing the 476 km “no-service” zone in Northern Ontario. Use apps like GasBuddy to plan your fuel stops strategically, as prices can vary dramatically between provinces. For overnight stops, the iOverlander app is an invaluable resource for finding safe and legitimate rest spots, from official campgrounds to informal pull-outs used by other long-haul travelers. Finally, before you even leave, download offline Google Maps for entire provinces. This ensures your primary navigation tool works when your data connection inevitably fails.
- Install a full-size spare tire (not a donut) and know how to change it.
- Carry a portable tire inflator and a battery booster pack for remote sections.
- Pack a satellite messenger (like a Garmin inReach) for no-service zones.
- Keep physical Backroad Mapbooks as a reliable GPS backup.
- Carry an extra jerrycan for the 476 km ‘no-service’ stretch in Northern Ontario.
- Download offline Google Maps for entire provinces before departure.
Your next step is to open a map, apply these logistical filters, and begin building an itinerary based on the reality of time and distance. By shifting your focus from what you want to see to how you can realistically and safely access it, you are already on the path to planning a truly successful and memorable Canadian grand tour.