
In summary:
- Success on the West Coast Trail hinges on building fatigue-resistance, not just general fitness, to prevent errors on technical terrain.
- Your training must simulate the trail’s three primary challenges: persistent mud, heavy pack weight on vertical climbs, and the mental stress of tidal deadlines.
- Focus on a systemic approach where footwear, pack weight, and moisture management work together to conserve energy.
- Mitigate the biggest risks by mastering ladder technique, understanding tide charts, and having the correct backcountry rescue insurance.
You have the reservation. The dates are circled on your calendar, a mix of excitement and a cold knot of dread in your stomach. The West Coast Trail isn’t just a hike; it’s a legend, infamous for its consuming mud, sky-high ladders, and the unforgiving Pacific tides. Your mind cycles through the warnings and the stories of hikers airlifted from the trail, and you wonder: am I ready for this? The common advice feels inadequate—”break in your boots” and “pack light” sound simple, but they don’t address the deep-seated fear of failure or injury.
The truth is, most training plans miss the real enemy on the WCT: cumulative fatigue. It’s the exhaustion on day five that makes your foot slip on a wet root. It’s the mental drain from constant rain that leads to a miscalculation on a tidal crossing. Standard gym workouts and weekend hikes don’t prepare you for this specific brand of depletion. The key to not just surviving, but conquering the trail, isn’t about having the most expensive gear; it’s about building systemic resilience against the physical and psychological toll.
This is where we shift the perspective. Think of your preparation not as a checklist, but as a strategic campaign against exhaustion. This guide reframes your training to focus on building the specific strength, endurance, and mental toughness required to master the WCT’s notorious challenges. We will dissect the critical decisions about footwear and pack weight, demystify the art of tidal navigation, transform your fear of ladders into confident technique, and cover the logistical and financial safety nets that turn a potentially trip-ending emergency into a manageable incident. Your goal is to stand at the trailhead in Port Renfrew or Bamfield not just hoping to finish, but knowing you are prepared to finish strong.
This comprehensive guide is structured to build your preparation layer by layer, addressing each major challenge of the trail. Below, you will find a detailed breakdown of the critical components for your training, from foundational gear choices to the nuances of backcountry safety.
Summary: Your Evacuation-Proof West Coast Trail Plan
- Boots vs. Trail Runners: Which Footwear Survives the WCT Mud?
- The 30-Pound Limit: How to Cut Base Weight Without Sacrificing Safety?
- Tide Tables: How to Time Your Beach Hiking to Avoid Being Trapped?
- The Ladder Fear: Techniques for Ascending Wet Wooden Ladders with a Heavy Pack
- The Trail Bus: How to Coordinate Logistics Between Bamfield and Port Renfrew?
- The Rule of Twelfths: How to Calculate Safe Crossing Times in Tidal Waters?
- Gaiters and Gore-Tex: How to Hike the West Coast Rainforest Without Getting Soaked?
- Do You Need Extra Health Insurance for Backcountry Rescue in Canada?
Boots vs. Trail Runners: Which Footwear Survives the WCT Mud?
The debate between heavy-duty hiking boots and lightweight trail runners is the first critical decision in your fight against fatigue. This choice is not just about comfort; it’s about energy preservation and injury prevention on a trail where every ounce matters. The stakes are high, as Parks Canada reports that 60-80 hikers require evacuation annually, with many incidents related to slips, falls, and lower-leg injuries exacerbated by poor footwear choices. The infamous WCT mud is a primary factor—it can suck boots off your feet and saturate any material, making lightweight and quick-drying a tempting proposition.
Hiking boots offer superior ankle support, crucial for preventing rolls on uneven terrain, and their rugged construction is more likely to withstand the trail’s 75-kilometre grind. However, their weight is a significant disadvantage. An extra pound on each foot is equivalent to carrying 5-10 extra pounds on your back, leading to faster exhaustion. Trail runners, on the other hand, are significantly lighter and dry much faster overnight, a major psychological and physical boost in a persistently damp environment. The trade-off is minimal ankle support and less durability. Your choice must be a calculated one, balancing your personal ankle stability with the undeniable energy savings of a lighter shoe.
Ultimately, the best footwear is the one that has been rigorously tested in conditions mimicking the WCT. Before committing, take your chosen boots or trail runners to the muddiest, rootiest trails you can find, like Vancouver’s North Shore or Bragg Creek in Alberta during the spring melt. Load your pack and see how they perform on steep, slippery terrain. This real-world test is the only way to know if your choice will help or hinder your journey.
This comparative table, based on extensive trail reports, breaks down the key performance differences to help guide your decision.
| Factor | Hiking Boots | Trail Runners |
|---|---|---|
| Ankle Support | Superior protection against rolls | Limited support, more flexibility |
| Weight Impact | 1.5-2 lbs per foot adds fatigue | Lighter weight reduces exhaustion |
| Mud Performance | Deep treads grip better | Self-cleaning lugs shed mud |
| Drying Time | 24-48 hours in humidity | 8-12 hours overnight |
| Durability | Survives 500+ km typically | 300-400 km before replacement |
The 30-Pound Limit: How to Cut Base Weight Without Sacrificing Safety?
The single greatest factor in your energy expenditure and injury risk on the West Coast Trail is your pack weight. While there’s no official rule, veteran hikers and coaches advocate for a base weight (your pack minus food and water) under 20 pounds, keeping your total weight below 35 pounds at the start. Exceeding this drastically increases the strain on your knees, back, and mental fortitude, especially on the trail’s 70+ ladder systems. The goal isn’t just to carry less; it’s to move more efficiently, reduce fatigue, and maintain the mental clarity needed to make safe decisions.
Cutting weight is a systematic process of auditing every single item. Start with the “big three”: your tent, sleeping bag, and backpack. Modern ultralight shelters and quilts can save you pounds. Next, scrutinize your clothing—opt for multi-use merino wool layers instead of cotton. For your kitchen, a single titanium pot and a canister stove are all you need. Repackage all food into ziplock bags to eliminate bulky commercial packaging and only carry what you need, plus one emergency day’s worth. Decant toiletries into tiny containers. Every gram counts. This ruthless minimalism is not about deprivation; it’s about buying you energy and resilience for the trail ahead.
Case Study: The Exponential Risk of Pack Weight
A study of hikers on the WCT revealed a stark correlation between pack weight and performance. As detailed in a report on WCT training, hikers with packs under 35 pounds moved faster and reported higher energy levels, while those carrying over 50 pounds showed significant fatigue. Crucially, the analysis demonstrated that every 5 pounds of additional pack weight exponentially increased injury risk after day four, particularly on grueling ladder climbs and slick, muddy sections. This highlights that a heavy pack isn’t just a comfort issue; it’s a primary safety hazard.
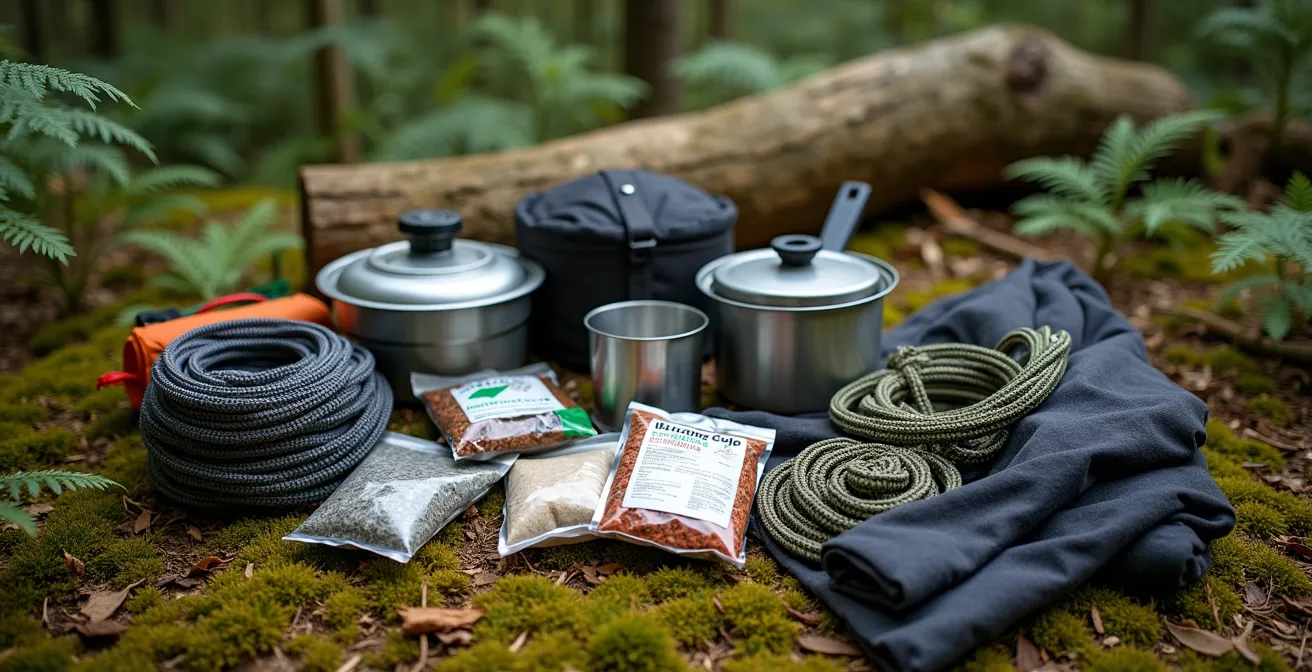
Visualizing your gear laid out, as shown above, is a powerful tool for this audit. It forces you to justify each item’s existence. If it doesn’t serve a critical function for safety, shelter, or sustenance, it doesn’t belong in your pack. This discipline before you leave is what prevents a potential evacuation on the trail.
Tide Tables: How to Time Your Beach Hiking to Avoid Being Trapped?
On the West Coast Trail, the Pacific Ocean is both a magnificent highway and a potential trap. Many sections of the trail are impassable at high tide, forcing hikers onto more difficult, muddy, and exhausting inland routes. Worse, some surge channels and headlands can become completely blocked, trapping unsuspecting hikers for hours between the cliffs and the pounding surf. Mastering the tide table is not an optional skill; it is a fundamental rule of survival on this coastline. Your mandatory orientation with Parks Canada will provide you with the official tables, which immediately become the most important document in your pack.
The core principle is simple: identify the impassable sections on your map each day and plan your hiking around them. Parks Canada recommends that certain areas are only safe when tides are below 2.4 meters, but this can vary. Your task is to calculate the “crossing window”—the block of time when the tide is low enough for safe passage. This involves more than just looking at the low tide time; you must account for the time it takes to reach the section and cross it. Always build in a significant safety buffer. A good rule of thumb is to plan to be through any tidal section at least two hours before it’s projected to close.
Visual cues on the beach are also critical. The line of wetness, seaweed, and barnacles on the rocks clearly indicates the recent high tide mark. If the water is anywhere near this line, you should not be attempting a coastal route. Relying on your watch, your map, your tide table, and your own direct observation is the system that ensures you won’t be the one scrambling up a cliff face to escape a rising tide.
Your Action Plan: Using Tide Tables on the WCT
- Obtain and Laminate: Get the official Parks Canada tide tables at your orientation. Keep a waterproof, printed backup.
- Daily Map Review: Before starting each day, mark all tidal restriction points on your map and note their required tide levels.
- Calculate Windows: Determine the safe crossing times for each point, using the Rule of Twelfths for precision in critical surge channels.
- Build a Buffer: Add a two-hour safety margin to every tidal crossing. Plan to be clear of the area well before the tide turns.
- Observe and Confirm: Trust your eyes. Use the barnacle line on the rocks as the definitive indicator of the high tide mark. If in doubt, wait or take the forest route.
The Ladder Fear: Techniques for Ascending Wet Wooden Ladders with a Heavy Pack
For many, the single biggest source of anxiety when planning for the WCT is the ladders. There are over 70 ladder systems on the trail, some ascending more than 100 feet up sheer cliff faces. They are often slick with coastal moisture and green with moss, and you must climb them while carrying a 35-pound pack that constantly tries to pull you backward. This is a unique physical and mental challenge that requires specific training and technique. Fear here is a rational response, but it can be managed and overcome with preparation.
The foundational technique is maintaining three points of contact at all times. This means two hands and one foot, or two feet and one hand, are always securely on the ladder. Move slowly and deliberately. Test each rung with your foot before committing your full weight. Wear gloves with a good grip to combat the slippery wood. The most critical technical adjustment is managing your center of gravity. You must actively lean forward, bringing your hips closer to the ladder, to counteract the pack’s backward pull. This “hip-forward lean” feels unnatural but is the key to maintaining balance and preventing a fall.
Case Study: The High Cost of a Slipped Grip
An analysis of WCT evacuations shows that falls from ladder systems are a primary cause of serious injuries. In one documented case, a hiker fell 20 feet onto jagged rocks after their hand slipped on a wet rung, resulting in multiple fractures. Investigations by Parks Canada consistently highlight that proper technique, specifically maintaining three points of contact and managing pack weight with a forward lean, dramatically reduces the risk of such accidents. This underscores that ladder safety is a learned skill, not a matter of luck.

As the close-up image shows, the interface between your hand and the ladder rung is your lifeline. Training should focus on building grip strength (e.g., pull-ups, dead hangs) and practicing the climbing motion with a fully loaded pack, even on a simple ladder at home or at a playground. It’s about programming the muscle memory so that the correct, safe movements are automatic, even when you’re tired and the exposure feels intense.
Every step is critical. Pay attention.
– Stephen Grace, AdventuresNW West Coast Trail Guide
The Trail Bus: How to Coordinate Logistics Between Bamfield and Port Renfrew?
Your West Coast Trail adventure doesn’t begin at the trailhead; it begins with the complex logistics of getting there and back. The trail is a one-way, 75-kilometre route between Port Renfrew in the south and Pachena Bay (near Bamfield) in the north. This means you will finish a week-long, exhausting trek a multi-hour drive away from where you started. Arranging reliable transportation is a critical, non-negotiable part of your plan that, if overlooked, can lead to significant stress, expense, and risk.
The primary solution for most hikers is the West Coast Trail Express, a private shuttle bus service specifically designed to connect the trailheads with Victoria and Nanaimo. This service must be booked months in advance, as seats are limited and fill up quickly once trail reservations open. You need to decide your direction of travel (north to south or south to north) and coordinate your bus booking to match. For example, if you are starting at Port Renfrew, you might park your car there, hike the trail, and take the bus from Pachena Bay back to your vehicle. The bus operators can even facilitate a key delivery service. Do not leave this to the last minute.
Pacing your final day is crucial. The bus runs on a strict schedule, and missing it is not a simple inconvenience. It often means an unexpected overnight stay in a remote location or hiring extremely expensive alternative transport.
Case Study: The Cost of a Missed Bus
One hiking group, detailed in a popular WCT guide, finished their trek at Pachena Bay just two hours after their scheduled bus departure. Their options were stark: wait 24 hours for the next day’s bus, requiring an unplanned night of accommodation, or hire a private water taxi to Bamfield for over $200 per person, followed by another chartered vehicle. The experience serves as a cautionary tale: rushing to meet a transportation deadline on technical, slippery terrain on your final, most-fatigued day is a recipe for injury. Building contingency time into your last day’s hike is a key part of your logistical planning.
Your plan should include having the contact numbers for both the trail bus and local water taxi services saved in your phone and on a waterproof piece of paper. This backup plan is a small but vital piece of your overall safety system.
The Rule of Twelfths: How to Calculate Safe Crossing Times in Tidal Waters?
While a standard tide table tells you the times of high and low tide, it doesn’t tell you how fast the water will rise or fall in between. This is critical for navigating the WCT’s surge channels and coastal shelves, where a few inches of water can make a crossing impassable. The Rule of Twelfths is a simple yet powerful method used by mariners to estimate the tide level at any given hour, and it is an essential skill for any WCT hiker. It provides the “why” behind the numbers on your tide chart, allowing for more precise and safer decision-making.
The rule approximates that in the six hours between low and high tide (or vice versa), the water level will change in increments of twelfths of the total tidal range (the difference in height between high and low tide). The flow is not linear; it is slowest at the turn of the tides and fastest in the middle hours. Specifically, the water level rises or falls by: 1/12 in the first hour, 2/12 in the second, 3/12 in the third, 3/12 in the fourth, 2/12 in the fifth, and 1/12 in the sixth. This means that half the total tidal change happens in the third and fourth hours. This is the period of maximum current and the most dangerous time to be caught in a marginal area.
By applying this rule, you can calculate with reasonable accuracy whether you have enough time to clear a tidal obstacle. For example, if you arrive at a channel two hours after low tide, you know the water has already risen by 3/12 (1/12 + 2/12) of its total range, and it is about to start rising much more rapidly. This knowledge transforms your planning from guesswork into a calculated assessment of risk.
This table, adapted from expert WCT guides, provides a clear visual of how to apply the rule for safe passage.
| Hour After Low Tide | Water Level Rise | Safe for Crossing? |
|---|---|---|
| Hour 1 | 1/12 of total range | Yes – Optimal window |
| Hour 2 | 2/12 of range | Yes – Still safe |
| Hour 3 | 3/12 of range | Marginal – Assess conditions |
| Hour 4 | 3/12 of range | No – Water rising rapidly |
| Hour 5 | 2/12 of range | No – Near high tide |
| Hour 6 | 1/12 of range | No – High tide |
Storm surges and high winds can alter water levels faster than the rule predicts, adding a crucial layer of expert safety advice.
– Parks Canada, West Coast Trail Hiker Preparation Guide 2024
This official warning is a reminder that the Rule of Twelfths is an excellent guide, but it must always be used in conjunction with on-the-ground observation of weather and sea conditions.
Gaiters and Gore-Tex: How to Hike the West Coast Rainforest Without Getting Soaked?
On the West Coast Trail, “staying dry” is a myth. The goal is not to avoid getting wet, but to manage moisture effectively to prevent hypothermia and maintain morale. With the Pacific Rim region receiving over 330 cm of rainfall annually, you must assume it will rain. Your gear and strategy should be built around this certainty. This is where a systemic approach to moisture management becomes far more effective than simply relying on a single “waterproof” jacket.
Your first line of defense is a high-quality rain jacket and pants (often Gore-Tex or a similar waterproof-breathable membrane) and a waterproof pack cover. However, in the persistent humidity of the BC coast, even the best membranes will eventually “wet out,” meaning the outer fabric becomes saturated and breathability ceases. This is why ventilation is more important than waterproofing. Use your pit-zips and other vents proactively. The moment the rain eases, open them up to let moisture escape. Your second critical component is your base layer. Avoid cotton at all costs; it loses all insulating properties when wet. Instead, use merino wool or synthetic layers that continue to provide warmth even when damp.
Knee-high waterproof gaiters are non-negotiable. They are your primary defense against the deep mud and constant water on the trail, keeping debris and moisture from entering the top of your boots. Finally, you must be disciplined about your “dry set.” Keep one full set of sleeping clothes—socks, base layer, and a toque—in a dedicated, high-quality dry sack. This set is for camp and sleeping only. It is your guarantee of a warm, dry night’s sleep, which is essential for recovering and rebuilding your mental and physical resilience for the next day’s challenges. You can even use your body heat overnight to help dry out damp socks or gloves by placing them inside your sleeping bag.
Key Takeaways
- Train for Failure Points: Your training isn’t for hiking; it’s for climbing a wet ladder on day six with a heavy pack. Identify the most difficult moments and simulate them.
- Resilience is a System: Footwear, pack weight, and moisture management are interconnected. A failure in one area drains energy and compromises the entire system.
- Calculated Risk over Fear: Master tools like tide tables and the Rule of Twelfths to turn anxiety about the environment into confident, data-driven decisions.
Do You Need Extra Health Insurance for Backcountry Rescue in Canada?
This is the question no one wants to ask, but it is one of the most important. In the event of a serious injury on the West Coast Trail, what happens and who pays for it? The answer is complex and filled with common, dangerous misconceptions. Understanding the nuances of rescue and medical transport costs in British Columbia is a final, critical layer of your preparation. A mistake here can have life-altering financial consequences.
There is a widespread belief that all search and rescue in Canada is free. This is only partially true. As the BC Search and Rescue Association clarifies, their volunteer services are provided at no charge. If you need to be located and extracted from the backcountry by a SAR team, you will not receive a bill for their time. However, this is where the free service ends.
Parks Canada Search & Rescue is often free, but BC Ambulance Service helicopter transport costs thousands.
– BC Search and Rescue Association, No Charge for Rescue Policy Statement
Once you are in the care of BC Ambulance Service, you are a patient. If your extraction requires a helicopter, the costs are substantial. For Canadian citizens who are not residents of British Columbia, these costs can be staggering. According to figures from organizations like the Alpine Club of Canada, non-BC residents face charges of approximately $2,800 per hour of helicopter time, plus other ambulance fees. Your provincial health card from Alberta, Ontario, or elsewhere will likely not cover these transportation costs. This is why having specific travel or backcountry insurance is not a luxury; it is an absolute necessity.
You must scrutinize any policy you have. Many standard travel insurance plans have exclusions for “hazardous activities,” a category under which a trek like the WCT could easily fall. You need to verify in writing that your policy explicitly covers backcountry hiking and helicopter ambulance services outside of your home province.
Your Insurance Verification Checklist
- Verify ‘Backcountry’ Coverage: Call your provider and ask, “Does my policy explicitly cover multi-day, unguided backcountry hiking in a remote national park?” Get the answer in writing.
- Scan for ‘Hazardous’ Exclusions: Read the fine print for exclusions related to “hazardous activities,” “mountaineering,” or “search and rescue.”
- Confirm Helicopter Ambulance: Ask specifically if “helicopter evacuation” is covered under “ambulance services” and what the monetary limit is.
- Check Provincial Scope: Confirm that your coverage is valid for incidents occurring in British Columbia, outside your home province.
- Consider Satellite Messenger Add-ons: If you carry a device like a Garmin inReach or SPOT, investigate their supplemental insurance plans (like GEOS), which are specifically designed for SAR and extraction costs.
- Document and Carry: Write down your policy number and the 24/7 assistance phone number on a waterproof card to carry with you at all times.
Your journey to the West Coast Trail begins not at the trailhead, but with the first deliberate step of this preparation plan. Move from fear to confidence by building your systemic resilience. Start your training today.