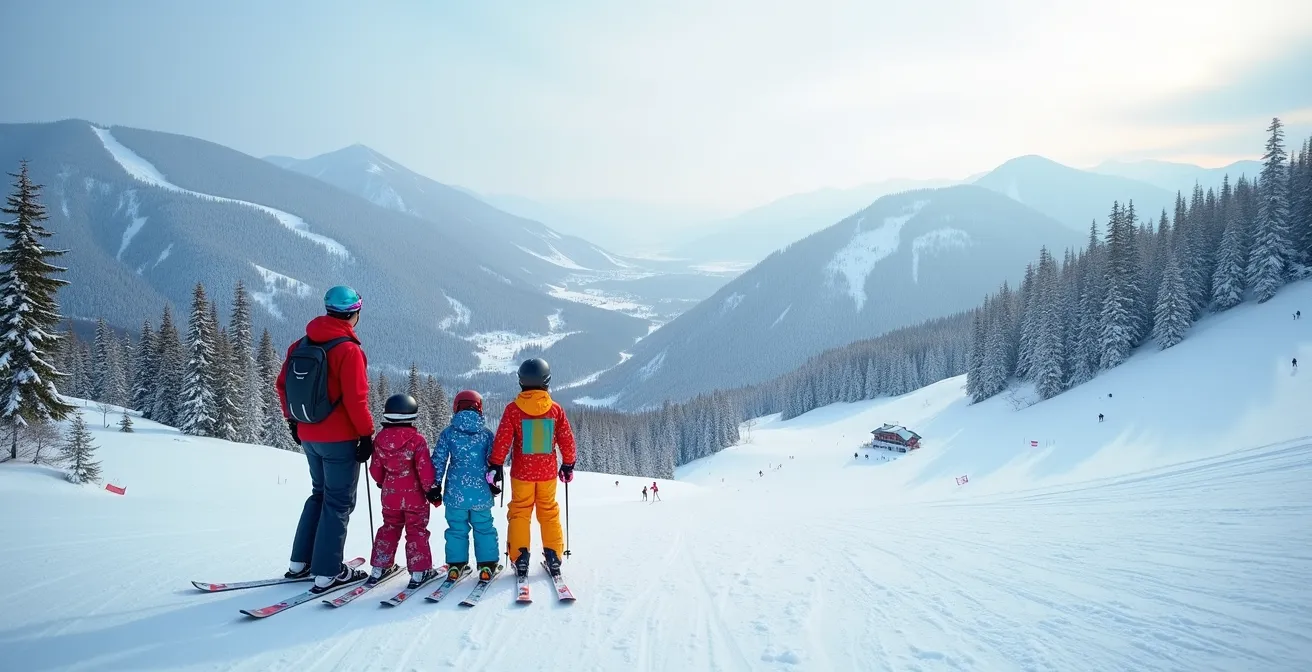
The best Canadian ski resort for your kids isn’t the one with the most runs, but the one whose terrain and logistics truly match your family’s learning curve.
- Whistler’s steeper “easy” runs are better suited to challenge progressing kids, while Tremblant’s gentler slopes are ideal for building a first-timer’s confidence.
- Peak booking times are driven by different provincial holidays at each resort, a crucial and often-overlooked planning factor for securing ski school spots.
Recommendation: Choose Tremblant for a young beginner’s confidence-building first trip and Whistler for a family that’s already comfortable on steeper North American blue runs.
Planning a major family ski vacation in Canada presents a classic dilemma: the European charm and accessibility of Quebec’s Mont-Tremblant versus the epic scale and raw power of British Columbia’s Whistler Blackcomb. Online forums will tell you Whistler is bigger and Tremblant is more picturesque. This is true, but it’s surface-level advice that misses the critical details that make or break a trip focused on teaching children to ski.
As a ski instructor and family travel planner, I know that a successful trip isn’t measured in vertical feet or the number of chairlifts. It’s measured in smiles, confidence gained, and a desire to return. The key isn’t simply choosing a resort with a ski school, but understanding the hidden operational differences—from non-standardized trail ratings to the unique booking pressures caused by regional school holidays—that directly impact your family’s learning progress, safety, and budget.
This guide moves beyond the generic comparisons. We will decode the crucial, often-overlooked variables that determine the true “best fit” for your family. We’ll analyze why you need to book months in advance, how to do the lift ticket math, why the end of the day is a danger zone, and how the very definition of a “blue run” changes from east to west. By the end, you’ll be equipped to make an informed decision based on what truly matters: a safe, fun, and progressive learning experience for your kids.
To help you navigate these critical planning stages, this guide breaks down the key factors to consider when choosing between these two world-class Canadian destinations for your family’s ski adventure. The following sections will provide an instructor’s perspective on everything from booking lessons to understanding the real-world differences in terrain.
Table of Contents: Tremblant vs. Whistler for a Family Ski Trip
- The December Rush: Why You Must Book Ski School Lessons 3 Months Early?
- Lift Ticket Math: When Does the Epic Pass Pay Off for a 5-Day Trip?
- The 3 PM Danger Zone: Why Most ACL Injuries Happen on the Last Run?
- Balaclavas and Hand Warmers: How to Keep a 5-Year-Old Skiing at -20°C?
- Blue Square Myths: Why a “Blue” Run in Quebec is a “Green” in the Rockies?
- High Performance Rentals: Is it Cheaper to Rent Demos in Whistler than Fly with Skis?
- The Layering System: What Boots are Essential for Standing on Snow for 3 Hours?
- How to Transport Ski Gear on Domestic Flights Without Paying Huge Fees?
The December Rush: Why You Must Book Ski School Lessons 3 Months Early?
The single biggest mistake families make when planning a ski trip for Christmas, New Year’s, or March Break is underestimating the competition for ski school spots. Unlike booking a hotel, securing a spot in a quality children’s program, especially with a bilingual instructor, requires planning months, not weeks, in advance. At premier Canadian resorts like Tremblant and Whistler, lessons for the December holiday period are often fully booked by late September.
This isn’t just about high demand; it’s about specific booking pressure points. Tremblant, for instance, experiences two distinct peak periods during March Break because Ontario’s and Quebec’s school holidays are staggered. This effectively creates a month-long “rush” that strains the availability of top instructors. Whistler sees immense pressure from international visitors and the Vancouver metro area, creating a similar bottleneck. Your ski lessons should be the first thing you book, even before flights or accommodations. Once lessons are secured, everything else can fall into place.

Waiting until November to book for a Christmas trip is a recipe for disappointment. You may find no availability at all, or be forced into less-desirable afternoon slots or private lessons at a significantly higher cost. The best instructors are always reserved first. To avoid this, a structured booking timeline is essential for a stress-free planning process that guarantees your kids get the instruction they need.
Your Family Ski Trip Booking Timeline
- 3-4 Months Out (Sept for Dec): Book all ski school lessons for every child. This is your number one priority.
- Immediately After Lessons are Secured: Reserve your accommodations. The best ski-in/ski-out units go quickly.
- Before Early-Bird Deadlines (Oct/Nov): Purchase your lift tickets or season passes to lock in the lowest prices.
- 6-8 Weeks Out: Book all necessary equipment rentals, especially for kids’ sizes or high-performance demos.
- 2-3 Weeks Out: Make dinner reservations, particularly for popular on-mountain or village restaurants during peak season.
Lift Ticket Math: When Does the Epic Pass Pay Off for a 5-Day Trip?
Once lessons are booked, the next major financial decision is how to pay for lift access. The era of walking up to the ticket window is over; doing so will cost you a fortune. The choice now lies between pre-purchasing multi-day tickets or investing in a season pass like the Epic Pass (for Whistler) or the Ikon Pass (for Tremblant). For a typical 5-day family ski trip, the break-even point is not always obvious.
The Epic Pass, which covers Whistler, has become a dominant force in the industry. It’s a key reason for the resort’s high volume of visitors, with reports indicating Vail Resorts sold 2.3 million Epic Passes in a recent season. This volume means that day-ticket prices are set exceptionally high to incentivize pass purchases. Generally, if you plan to ski more than four days at Whistler, the Epic Pass starts to offer significant savings, especially when factoring in the included “buddy tickets” and other discounts.
For Tremblant, the Ikon Pass is the equivalent. The math here is similar, though the price points and break-even calculations differ. The key is to do the math for your specific family configuration (number of adults and children) well before the early-bird pass deadlines, which typically fall in late autumn. These passes offer the best value, but they require a significant upfront investment and a commitment to a specific resort ecosystem.
This comparative table breaks down the essential features for a family considering a trip to either resort. Note that prices are for illustrative purposes and should be verified on the official pass websites for the current season.
| Pass Feature | Epic Pass (Whistler) | Ikon Pass (Tremblant) |
|---|---|---|
| Adult Pass Price | $1,121 USD | $1,519 USD |
| Child Pass Price (5-12) | $572 USD | $449 USD |
| Canadian Resort Access | Unlimited at Whistler only | Unlimited at Tremblant & Blue Mountain |
| Friends & Family Tickets | 10 discounted buddy tickets | 25% off up to 12 tickets |
| 5-Day Break-Even Point | 3.5 ski days at Whistler | 4.5 ski days at Tremblant |
The 3 PM Danger Zone: Why Most ACL Injuries Happen on the Last Run?
As a ski instructor, my primary focus is safety, and one of the most predictable risks on the mountain is the “3 PM Danger Zone.” This is the period late in the day when legs are tired, concentration wanes, and skiers of all ages—especially children—push for “just one more run.” This is precisely when most preventable injuries, including serious ones like ACL tears, occur. The desire to maximize a costly lift ticket often overrides good judgment.
Statistics confirm this pattern. Studies on ski accident timing show a significant spike in incidents late in the afternoon. For example, one analysis found that 17% of accidents occur in the early afternoon, with another rise after 3:30 PM as fatigue fully sets in. For children, this effect is amplified. Their smaller bodies lose heat faster, and their mental endurance is lower. Data from Canadian health authorities on pediatric ski injuries shows that among children, those aged 5 to 9 are a high-risk group, with most injuries resulting from simple falls, not collisions—a classic sign of fatigue.
The key to preventing these injuries is learning to recognize the signs of the fatigue threshold in your child, before they reach their breaking point. It is always better to end the day on a high note, an hour early and safely, than to push for a final run that ends in the ski patrol toboggan. A successful ski day is one where everyone is tired but happy, ready to ski again tomorrow. Forcing a child who is cold, hungry, or exhausted is a dangerous gamble.
Checklist: Child Fatigue Warning Signs on the Slopes
- Emotional State: Notice increased frustration, complaining, or crying over minor stumbles or falls.
- Loss of Focus: Observe if your child is having difficulty following simple instructions or seems distracted.
- Physical Technique: Watch for slower reaction times, a revert to old habits (like the “pizza”), or difficulty linking turns.
- Physical Complaints: Listen for repeated complaints about being cold, even with proper gear, or about sore muscles.
- The “Are We Done Yet?” Factor: Take it seriously when they start asking about lunch, hot chocolate, or when skiing will be over.
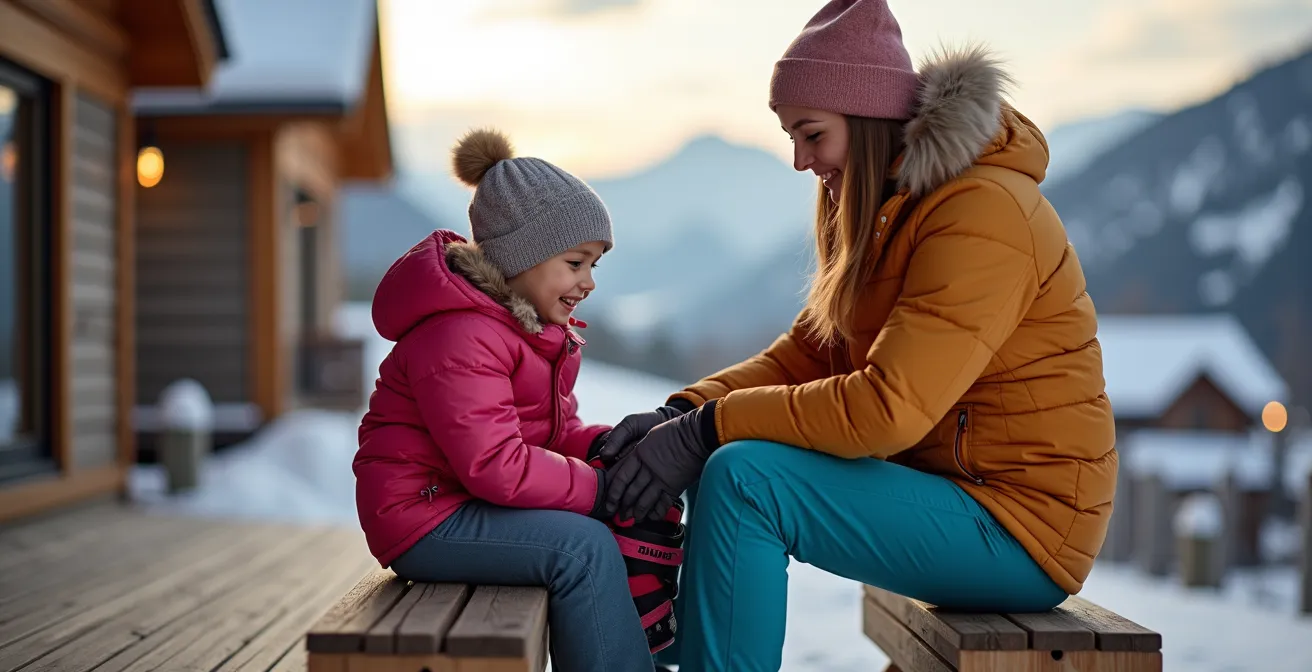
Balaclavas and Hand Warmers: How to Keep a 5-Year-Old Skiing at -20°C?
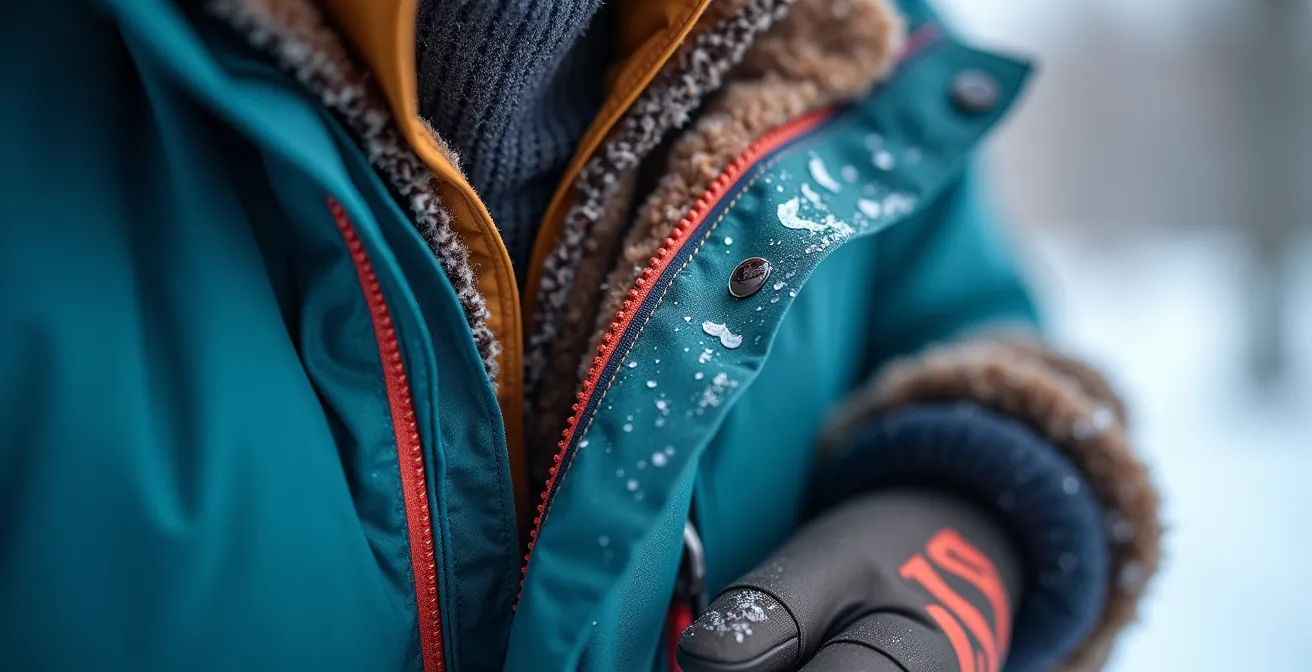
Dressing a child for a Canadian ski day is a science, especially when facing temperatures of -20°C or colder. The difference between a joyful day on the slopes and a miserable, tear-filled retreat to the lodge often comes down to a few key pieces of gear and a proper layering strategy. The most common mistake is thinking “more is better” (e.g., two pairs of socks) or using the wrong materials (e.g., cotton).
The concept of thermal drift is crucial here. As the Canadian Ski Patrol Association notes, “The humid, deep cold of Quebec is fundamentally different from the typically milder, drier cold of Whistler.” The damp cold at Tremblant can feel more bone-chilling at -15°C than a dry -20°C day in the Rockies. This means your gear strategy must account for humidity. The non-negotiable rule is no cotton, as it holds moisture against the skin and accelerates heat loss. Merino wool is the gold standard for base layers and socks.
For a 5-year-old, small details make a huge difference. A balaclava is essential, but it must be tucked inside the jacket collar to create a seal against the wind. Mittens are always superior to gloves as they keep fingers together for warmth. Placing a chemical hand warmer inside the mitten (on the back of the hand, not the palm) can extend a child’s comfort by hours. Remember, their happiness is directly tied to their warmth. A cold child cannot learn and will not have fun.
Checklist for Extreme Cold: Kids’ Ski Gear
- Base Layer: A snug-fitting, mid-weight merino wool top and bottom are essential. Avoid all cotton.
- Mid-Layer: A fleece jacket or vest provides insulation. A high collar adds crucial neck protection.
- Outer Shell: A high-quality waterproof and windproof jacket and pants, preferably with a powder skirt on the jacket.
- Head and Face: A thin balaclava that fits comfortably under the helmet is mandatory. Ensure it’s tucked into the jacket.
- Hands and Feet: Use waterproof mittens, not gloves. Add chemical hand warmers for the coldest days. Wear a single, high-quality pair of merino wool ski socks—never double up.
Blue Square Myths: Why a “Blue” Run in Quebec is a “Green” in the Rockies?
One of the most dangerous assumptions a family can make is that a trail rating is a universal standard. A blue square (intermediate) at Tremblant is not the same as a blue square at Whistler. This concept of terrain relativity is rooted in geology and has massive implications for a child’s confidence and safety. Taking a child who just mastered Tremblant’s blue runs and putting them on a Whistler blue can be a terrifying and confidence-shattering experience.
The reason lies in the mountains themselves. The Laurentians, where Tremblant is located, are among the oldest mountains in the world. They are ancient, rounded, and worn down, resulting in generally gentler, more consistent pitches. The Coast Mountains of British Columbia, home to Whistler, are geologically young, jagged, and dramatic. This creates runs that are inherently steeper, with more variable pitches and complex fall lines, even on trails designated as “intermediate.”
For a beginner, this difference is stark. A green circle (beginner) run at Tremblant might be a wide, gentle slope with an 8% grade. A green run at Whistler could easily be twice as steep. This doesn’t mean Whistler is “bad” for beginners, but it does mean a child needs to be a much more confident and skilled skier to handle Whistler’s “easy” terrain compared to Tremblant’s. For a true first-timer, the mellow slopes of the Laurentians are often a far better environment for building foundational skills without fear.
This table illustrates the practical difference in pitch you can expect, highlighting why a direct comparison based on color-coded symbols is misleading.
| Difficulty Level | Tremblant (Laurentians) | Whistler (Coast Mountains) | Actual Pitch Difference |
|---|---|---|---|
| Green (Beginner) | Nansen Trail – 8% grade | Ego Bowl – 15% grade | Nearly double the incline |
| Blue (Intermediate) | Johannsen – 20% grade | Franz’s Run – 30% grade | 50% steeper |
| Black (Advanced) | Dynamite – 35% grade | Couloir Extreme – 45% grade | Significantly steeper |
High Performance Rentals: Is it Cheaper to Rent Demos in Whistler than Fly with Skis?
The logistics of getting your gear to the resort introduce another layer of calculation: the gear economics of renting versus flying. For families, especially those with growing children, renting is almost always the more sensible option. However, for adults with their own high-performance equipment, the decision is more nuanced and comes down to a simple cost-benefit analysis.
First, calculate the cost of flying with your gear. Most major Canadian airlines charge for ski and snowboard bags as oversized items. You can expect excess baggage fees for ski equipment to average $150-200 CAD roundtrip, per person. For a family of four, this can quickly add up to $600-$800, plus the hassle of lugging multiple large bags through the airport and fitting them into a rental car.
Next, compare this to the cost of a 5-day high-performance or “demo” rental package at the resort, which typically runs $65-$85 per day. While this might seem more expensive at first glance ($325-$425 for five days), it comes with a significant advantage: the ability to swap skis based on conditions. If a huge powder day arrives, you can exchange your all-mountain skis for a pair of fat powder skis at no extra cost. This flexibility can transform your experience on the mountain. For kids, whose feet and height change annually, renting is a clear winner over purchasing equipment they will quickly outgrow.
Decision Matrix: Renting Demos vs. Flying with Gear
- Calculate Flight Costs: Multiply the roundtrip baggage fee by the number of family members traveling with gear.
- Factor in Hassle: Add a non-monetary cost for airport logistics. Will you need a larger, more expensive rental car to fit all the bags?
- Compare Rental Prices: Get quotes for 5-day demo rental packages for each adult at the destination resort.
- Consider Flexibility: Weigh the value of being able to swap skis to match daily snow conditions (e.g., powder, ice, groomed).
- Factor in Kids’ Growth: For children, acknowledge that they will likely outgrow expensive equipment within a season, making rentals the more economical long-term choice.
The Layering System: What Boots are Essential for Standing on Snow for 3 Hours?
While jackets and pants get a lot of attention, the single most critical piece of equipment for any skier, especially a parent or instructor who spends hours standing on snow, is their boots. This includes both your ski boots on the hill and your après-ski boots for walking around the village. An ill-fitting or non-insulated boot will end your day faster than any other gear failure.
For ski boots, the goal is a snug, performance-oriented fit without creating pressure points that cut off circulation. Numbness is not normal; it’s a sign your boots are too tight or poorly fitted. Parents often over-tighten their children’s boots, leading to cold, painful feet. The buckles should be just tight enough to prevent heel lift, but no tighter. A professional boot fitting is the best investment you can make in your own skiing comfort.
For walking around the village, especially in the cold and often icy conditions of Tremblant or Whistler, a proper winter boot is not a luxury—it’s essential for safety. Look for boots with a temperature rating of at least -20°C, excellent traction, and waterproof construction. Standing on a cold, snowy platform watching your child in a lesson for three hours requires footwear that is just as technical as what you wear on the slopes. Forgetting this crucial piece of the layering system is a common mistake that leads to miserable, cold-footed parents.
Even with a good fit, minor pains can arise. This guide can help you diagnose and address common ski boot issues on the fly.
| Pain Location | Likely Cause | Quick Fix |
|---|---|---|
| Top of foot | Buckle too tight | Loosen top two buckles one notch |
| Heel lifting | Boot too big | Add heel lifts or thicker insole |
| Shin pressure | Forward lean incorrect | Adjust forward lean mechanism if possible |
| Numbness in toes | Poor circulation | Loosen the bottom buckle; wiggle toes on every lift ride |
Key Takeaways
- Trail ratings are not standardized; a blue run in Quebec’s rounded Laurentians is often equivalent to a green run in BC’s steep Coast Mountains.
- The “last run of the day” is a statistical danger zone for injuries due to child fatigue. It’s always safer to end the day an hour early on a high note.
- The humid, damp cold of Eastern Canada requires a more robust layering strategy than the dry cold of the West, with a strict “no cotton” rule.
How to Transport Ski Gear on Domestic Flights Without Paying Huge Fees?
If you’ve run the numbers and decided that bringing your own gear is the right call, the final challenge is navigating airline baggage policies without incurring surprise overweight or excess baggage fees. With a smart packing strategy, you can transport your equipment efficiently and cost-effectively. The key is to understand the specific rules of your airline, as they can vary slightly.
Most North American airlines, including Air Canada, have a skier-friendly policy. As the official Air Canada Baggage Policy states, “A ski bag and a boot bag count as a single piece of checked luggage if they only contain skis and boots.” This is the most important rule to leverage. Do not check your boot bag separately. By pairing them, you are only using one of your checked bag allowances. This simple trick can save you over $100 in fees each way.
The second rule is to manage weight. Most airlines have a standard weight limit of 50 lbs (23 kg) per checked item. A combined ski and boot bag can easily exceed this limit if you pack it with extra items. Use the ample space in your ski bag strategically to pack soft goods like your ski jacket, pants, and other clothing, but be sure to weigh the final bag at home. An overweight fee can often be more than the cost of an entire extra bag. For large family or multi-family trips, using a dedicated service like Ship Skis can sometimes be more economical and far more convenient than dealing with a dozen bags at the airport.
Your Airline Ski Bag Packing Strategy
- Consolidate Items: Always present your ski bag and boot bag together at check-in; they are treated as one item by most airlines.
- Pack Smart: Use the extra space in the ski bag for soft, bulky items like jackets and ski pants to protect your gear and consolidate luggage.
- Weigh at Home: Ensure your combined ski/boot bag stays under the 50lb (23kg) limit to avoid costly overweight surcharges.
- Consider Shipping: For large groups or long trips, get a quote from a service like Ship Skis to compare against airline fees and hassle.
- Check-in Online: When checking in, declare your “Sports Equipment” to ensure it’s tagged and handled correctly by the airline.
Now that you have the complete framework for choosing the right resort, timing your booking, and managing your gear, you are fully equipped to start building your family’s personalized Canadian ski trip itinerary.