The fantasy of a spontaneous sunrise drive to Moraine Lake is over; accessing it now requires a precise logistical plan.
- Parks Canada shuttle tickets are the primary access method, but they sell out in minutes. Mastering the 8 AM MDT booking window 48 hours in advance is critical.
- When—not if—the official shuttle is full, your strategy must immediately pivot to licensed commercial operators or alternative, equally stunning locations like Bow Lake or Peyto Lake.
Recommendation: Stop hoping for access and start planning for it. Create a multi-layered itinerary with primary, secondary, and tertiary options for each day of your visit.
You’ve seen the photos. The impossibly turquoise water, the majestic Valley of the Ten Peaks—Moraine Lake is a photographer’s pilgrimage. You’ve planned the trip, packed your gear, and set your alarm for a pre-dawn departure, envisioning that perfect, crowd-free sunrise shot. Then you discover the hard reality: you can’t drive there anymore. Since 2023, Parks Canada has banned private vehicle access to Moraine Lake Road year-round. This single policy change has turned a simple scenic drive into a complex logistical challenge, leaving many visitors, especially photographers chasing specific light, feeling frustrated and confused.
The common advice you’ll hear is to “just book the shuttle” or “try a tour.” While technically correct, this guidance fails to capture the brutal reality of the situation. The demand for access far outstrips the supply, and without a concrete strategy, your chances of seeing the lake are slim. Many simply give up, missing out on one of the crown jewels of the Canadian Rockies. This is not a situation to be navigated with hope; it’s a problem to be solved with planning.
But what if the key wasn’t just knowing the options, but understanding the system and how to exploit its pressure points? This guide is not another simple list of bus companies. It’s a pragmatic, tactical manual from the perspective of a logistics expert. We will treat your visit to Moraine Lake like a mission. You will learn the precise, second-by-second strategy for the 8 AM shuttle booking scramble, build a robust backup plan for when that fails, and identify superior alternative locations that offer breathtaking views without the logistical nightmare. It’s time to trade disappointment for a solid plan.
This article provides a comprehensive framework for navigating the new access rules for Moraine Lake and the surrounding Banff area. Explore the sections below to build your foolproof itinerary.
Summary: A Tactical Guide to Moraine Lake and Banff Without a Car
- The 8 AM scramble: How to Secure a Parks Canada Shuttle Ticket 48 Hours Before?
- Larch Valley: Is the Hike Worth the Effort for the View of the Ten Peaks?
- Peyto Lake or Bow Lake: Which Offers the Best Blue Water Without the Shuttle Hassle?
- Why is Lake Louise Frozen Until June? Understanding Glacial Melt Timing
- Sunrise vs. Sunset: When is the Lighting Best for Lake Louise Photography?
- Why Leaving at 6 AM is Crucial for the Cabot Trail in July?
- Daily vs. Discovery Pass: Which Parks Canada Option is Cheaper for a 6-Day Trip?
- How to Visit Banff and Jasper in July Without Being Stuck in Traffic?
The 8 AM scramble: How to Secure a Parks Canada Shuttle Ticket 48 Hours Before?
Let’s be pragmatic: securing a Parks Canada shuttle ticket to Moraine Lake is a competitive sport. A portion of reservations are released at 8 AM Mountain Daylight Time (MDT), exactly 48 hours in advance, and they are gone in seconds. This is not an exaggeration; as Parks Canada data confirms that reservations in 2024 often sold out within minutes of the release. Hoping to log on at 8:05 AM is a recipe for disappointment. Success requires speed, preparation, and a clear plan of attack. You are competing with thousands of other people and automated bots for a very limited number of seats. Treating this as a casual booking process will result in failure.
Your goal is to eliminate every possible delay in the checkout process. This means having your account created, being logged in, and having your payment information at your fingertips before the clock strikes eight. Any hesitation, any fumbling for a credit card, means someone else gets your seat. The system is unforgiving. If you are unsuccessful, do not waste time refreshing endlessly. Your immediate next step is to pivot to your backup plan: the commercial operators. Their prices are higher, but they often have same-day or next-day availability when Parks Canada is sold out. This is your first lesson in redundancy planning.
Your Action Plan: The 48-Hour Booking Scramble
- Account Preparation (T-24 hours): Create your Parks Canada Reservation account well in advance. If you are not a Canadian resident, use the GCKey option. Ensure all your personal details are correct.
- Pre-Launch Sequence (T-5 minutes): At 7:55 AM MDT, log in to your account. Navigate to the ‘Day Use’ tab and then select the ‘Shuttle to Lake Louise and Moraine Lake’ page. Have your credit card physically in your hand.
- Execution (T-0 seconds): At exactly 8:00:00 AM MDT, refresh the page. Do not wait until 8:01. Select your desired time slot and number of tickets instantly and proceed. The most popular slots (early morning) go first.
- Checkout Sprint (T+30 seconds): Complete the payment information as quickly as possible. The system may time you out, so aim to complete the entire transaction in under two minutes.
- Immediate Pivot (If Unsuccessful): If you get an error or see no availability, immediately open new tabs for commercial operators like the Moraine Lake Bus Company or Fairview Limousine. Check their availability for your desired day.
Mastering this process doesn’t guarantee a ticket, but it dramatically increases your odds from near-zero to plausible. It transforms you from a passive hopeful into an active competitor.
Larch Valley: Is the Hike Worth the Effort for the View of the Ten Peaks?
Once you’ve successfully navigated the shuttle logistics and arrived at Moraine Lake, the next question often arises: is the popular Larch Valley hike worth the effort? For photographers and view-seekers, especially during the brief, spectacular autumn window when the larch trees turn golden, the answer is an emphatic yes. The trail elevates you above the shoreline crowds, offering a completely different and arguably more profound perspective of the Valley of the Ten Peaks. It’s a moderate-to-difficult hike, but the reward is a world-class vista that the casual visitor at the Rockpile will never see.
The beauty of the Larch Valley trail lies in its progressive reveal. You move through a dense forest before emerging into an open meadow, where the scale of the surrounding peaks becomes truly apparent. This is where you can achieve compositions that frame the iconic mountains with the unique texture of the golden larches. However, “worth it” is subjective and depends on your physical ability and tolerance for crowds. The trail is extremely popular in September. If you’re looking for an easier or less-crowded alternative, other trails offer different, if less spectacular, views.
A pragmatic scenery triage is necessary. The table below breaks down the effort-to-reward ratio for Larch Valley compared to other popular viewpoints accessible from Moraine Lake. This allows you to make an informed decision based on your group’s fitness and time constraints.
| Trail | Difficulty | Elevation Gain | Time Required | Ten Peaks View Quality | Crowd Level |
|---|---|---|---|---|---|
| Larch Valley | Moderate-Hard | 535m | 4-5 hours | Excellent | Very High (Sept) |
| Rockpile Trail | Easy | 24m | 15 minutes | Good | Extremely High |
| Fairview Lookout | Moderate | 100m | 45 minutes | Moderate | Moderate |
| Big Beehive | Hard | 520m | 5-6 hours | Fair | Moderate |
Peyto Lake or Bow Lake: Which Offers the Best Blue Water Without the Shuttle Hassle?
When Moraine Lake access seems impossible, the savvy visitor doesn’t give up; they pivot. The Icefields Parkway, just a short drive from Lake Louise, is home to several other glacier-fed lakes that offer the same stunning turquoise color without the shuttle requirement. The two best alternatives are Peyto Lake and Bow Lake. Both are directly accessible by car and provide spectacular, photo-worthy scenery. The question is, which one should you choose?
The answer often depends on the time of year. While both are magnificent, they don’t thaw at the same rate. According to local observations, Bow Lake’s lower elevation gives it a distinct advantage in the early season. For visitors arriving in early June, Bow Lake typically thaws and reveals its vibrant blue color a full week before Peyto Lake, making it the more reliable choice for that iconic shot. Peyto Lake’s viewpoint is higher and more panoramic, often described as looking like a wolf’s head, but seeing it still covered in ice can be a disappointment if you’re expecting blue water. Both are victims of their own popularity, and parking can be a challenge mid-day, a direct result of visitor displacement from Moraine Lake and a staggering 71% increase in Lake Louise area traffic over the past decade.
For photographers, Bow Lake offers the advantage of being able to walk right to its shoreline, offering opportunities for low-angle shots and reflections that are impossible from the elevated Peyto Lake viewpoint. You can frame the Crowfoot Glacier and Wapta Icefield in your shots. Peyto Lake, on the other hand, is all about the grand, sweeping landscape from above. Your choice depends on the composition you seek and, crucially, the timing of your visit. An early June trip almost always favors Bow Lake for color.
Why is Lake Louise Frozen Until June? Understanding Glacial Melt Timing
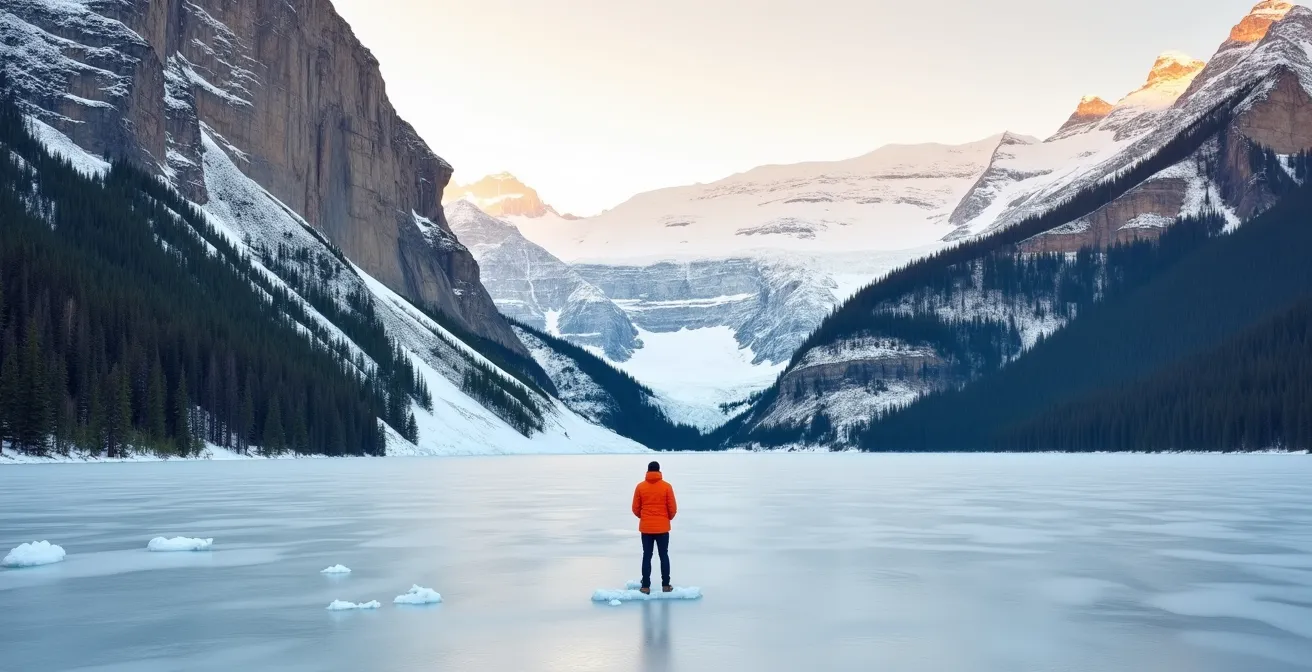
A common disappointment for early-season visitors to Banff is arriving at the world-famous Lake Louise only to find a vast, solid-white expanse of ice instead of the turquoise jewel seen in photos. Many travelers from warmer climates are caught off guard, assuming a May or early June visit will coincide with summer conditions. The reality is that these high-altitude lakes operate on a much later schedule. Understanding the science behind the thaw is key to timing your trip correctly and managing expectations.
The iconic color of Lake Louise isn’t just water; it’s a suspension of fine-grained sediment. As the Banff and Beyond Travel Guide explains, the process is driven by glacial melt:
The lakes in the mountains that have vivid blue and green colours are glacier fed. As the melt water from a glacier starts to flow in the spring time it carries with it glacier silt or rock flour.
– Banff and Beyond Travel Guide, When Do The Rocky Mountain Lakes Thaw
This “rock flour” refracts sunlight to produce the brilliant blue and green hues. Therefore, two things need to happen: first, the lake’s thick winter ice needs to melt completely (the “ice-off”), and second, the glaciers high above need to be actively melting to feed the lake with this crucial silt. This process is highly variable and depends on the winter’s snowfall and the spring’s temperatures. Trying to predict the exact date is futile; instead, it’s better to understand the historical window. For Lake Louise, this can be surprisingly late, as historical data on Lake Louise ice-off dates shows a wide range, typically between the last week of May and the third week of June. To be safe, if the turquoise water is your primary goal, plan your trip for July or August.
Sunrise vs. Sunset: When is the Lighting Best for Lake Louise Photography?
For a photographer, the time of day is everything. At Lake Louise, the classic shot faces west, towards the Victoria Glacier. This orientation dictates the optimal lighting conditions. While a beautiful sunset can cast warm light on the mountains, the most dramatic and sought-after light is at sunrise. During sunrise, the rising sun behind you illuminates the face of the glacier and surrounding peaks with a breathtaking pink and orange light known as alpenglow. This happens roughly 20-30 minutes before the sun crests the horizon, followed by the direct, golden-hour light. This makes sunrise the undisputed best time for classic photography at Lake Louise.
However, the hard truth for photographers focused on Moraine Lake is that the shuttle system makes capturing golden hour difficult, especially at sunset. The ‘Alpine Start’ shuttle (4 AM and 5 AM) is the only Parks Canada option that gets you to Moraine Lake for sunrise. Conversely, the last regular shuttle of the day often departs *before* sunset during the peak summer months. This means that to photograph a sunset at Moraine Lake, you are almost entirely dependent on booking a private commercial operator that offers later return times. This adds another layer of cost and complexity to your planning.
Given these logistical hurdles at Moraine Lake, a pragmatic photographer should consider focusing their golden-hour efforts on the more accessible Lake Louise. While parking is still challenging, it is at least possible to arrive on your own schedule. Following a dedicated sunrise strategy for Lake Louise can yield spectacular results without the uncertainty of the shuttle lottery.
- Arrive at the Lake Louise lakeshore parking lot by 5:50 AM in peak season (July/August) to secure a spot. It often fills before 6:30 AM.
- Position yourself along the right-hand shoreline (when facing the lake) for the best compositions that include the boathouse and the full sweep of the glacier.
- Utilize the pre-dawn “blue hour” for moody long-exposure shots, smoothing the water’s surface to a mirror-like finish.
- Be ready to capture the peak alpenglow on the Victoria Glacier, which occurs about 20-30 minutes before the actual sunrise.
- After the sunrise, consider hiking partway up the Fairview Lookout or Lake Agnes trail by 9 AM for an elevated perspective with clean morning light.
Why Leaving at 6 AM is Crucial for the Cabot Trail in July?
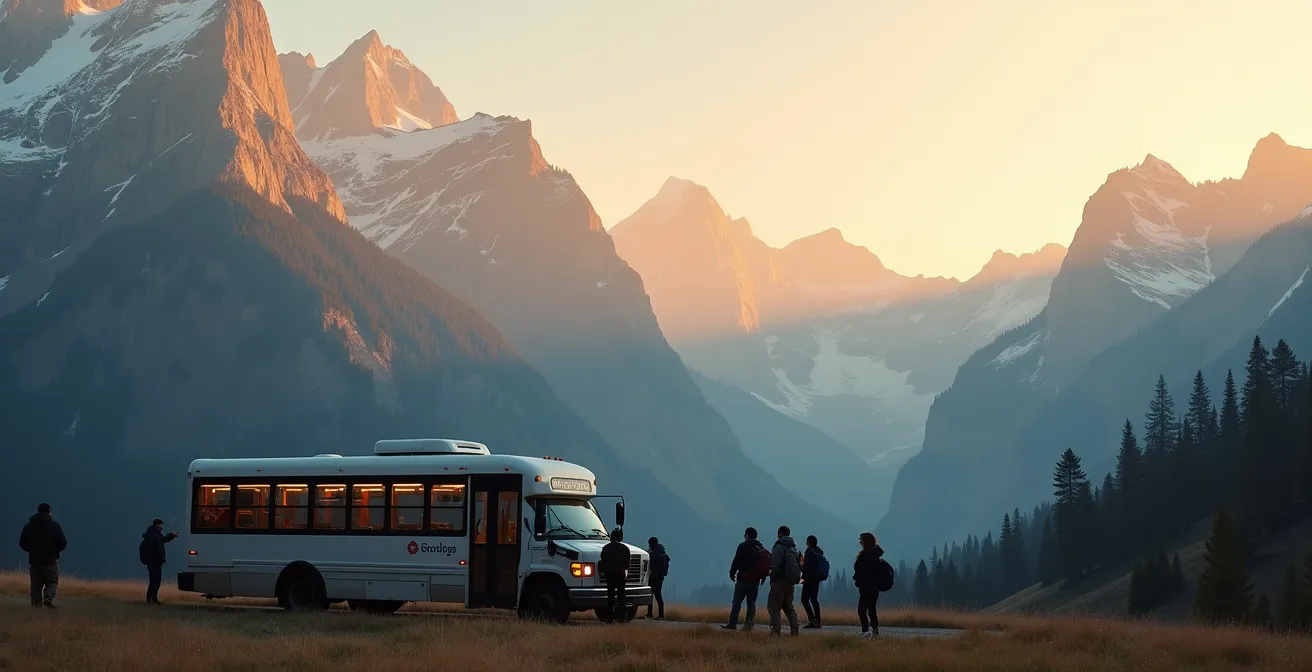
The “get up before the sun” strategy is not unique to Banff. It is a fundamental rule for visiting any popular Canadian scenic route during peak season, from the Rockies to the Maritimes. The Cabot Trail in Nova Scotia’s Cape Breton Highlands National Park is a perfect case in point. While it doesn’t have the same shuttle restrictions as Moraine Lake, it faces a similar challenge in July and August: massive influxes of visitors that can turn a scenic drive into a frustrating crawl, especially at key lookouts.
The core issue is the arrival of tour buses. On the Cabot Trail, large coaches originating from Halifax and Sydney typically begin arriving at the most popular viewpoints, like the Skyline Trail or the MacKenzie Mountain lookout, around 10 AM. By starting your drive at 6 AM, you give yourself a crucial four-hour window to experience the most stunning sections of the trail in relative peace. This allows you to secure parking at trailheads and enjoy the vistas without jostling for a spot to take a photo. Driving the trail counter-clockwise (starting towards Chéticamp) is often recommended, as it places you on the “outside lane” for unobstructed coastal views.
This principle is so universal that the patterns are almost identical across the country. In the Rockies, for example, starting a hike at 6 AM is the standard advice for avoiding tour groups arriving from Calgary and Edmonton. The vehicle types and company names change, but the dynamic is the same: the period between 6 AM and 10 AM is the golden window for independent travelers. By 11 AM, the experience is fundamentally different—more crowded, slower, and less serene. For anyone serious about photography or simply enjoying the landscape, the 6 AM start is not a suggestion; it’s a critical component of your logistical plan.
Daily vs. Discovery Pass: Which Parks Canada Option is Cheaper for a 6-Day Trip?
A practical question for any multi-day trip to Banff and Jasper is how to handle park entry fees. You have two primary options: purchasing a daily pass for each day you’re in the national parks or buying an annual Parks Canada Discovery Pass. For a visitor staying for a week, the math can seem confusing, but there is a clear break-even point. A common misconception is that the Discovery Pass is only for frequent visitors, but for groups or even couples, it quickly becomes the most economical choice.
The decision hinges on two factors: the length of your stay and the number of people in your vehicle. A daily pass is priced per person, but a family/group daily pass covers up to seven people in one vehicle. The Discovery Pass is also sold for individuals and for a family/group. For a trip of six days, the cumulative cost of daily passes approaches, and can sometimes exceed, the cost of an annual pass. This is confirmed by a cost break-even analysis for Parks Canada passes, which clearly outlines the tipping point.
The table below breaks down the costs based on 2024 pricing. As you can see, for any group of two or more, or even a solo traveler staying a full week, the numbers converge. The Discovery Pass offers the added benefit of simplicity—you display it once and don’t have to worry about it again for the rest of your trip, or for any other Canadian national park you visit within the year.
| Group Type | Daily Pass Cost | 6-Day Total | Discovery Pass Cost | Break-Even Point |
|---|---|---|---|---|
| Single Adult | $10.50 | $63.00 | $72.25 | 7 days |
| Senior | $9.00 | $54.00 | $61.75 | 7 days |
| Family/Group (up to 7) | $21.00 | $126.00 | $145.25 | 7 days |
| Two Adults | $21.00 | $126.00 | $145.25 | 7 days |
Essentially, if your trip is seven days or longer, the Discovery Pass is always the cheaper option. For a six-day trip, it’s a borderline call that often comes down to convenience.
Key Takeaways
- Access to Moraine Lake is a logistical challenge; success requires planning for the 8 AM shuttle booking and having commercial operators as an immediate backup.
- Embrace “scenery triage” by having alternatives like Peyto Lake or Bow Lake ready, especially if your primary plan fails.
- Time your visit correctly: the iconic turquoise color of the lakes doesn’t appear until the ice has fully melted, typically by mid-to-late June.
How to Visit Banff and Jasper in July Without Being Stuck in Traffic?
The core challenge of visiting Banff and Jasper in July isn’t just seeing the sights; it’s doing so without spending half your day in a traffic jam or circling a full parking lot. With access to Moraine Lake restricted and Lake Louise parking filling before sunrise, a successful trip requires abandoning the idea of driving everywhere. The solution is a “Park and Ride” strategy, where you use designated hubs and the public transit system as the backbone of your itinerary. This approach requires more planning but results in a far less stressful and more efficient visit.
The Roam Transit system in Banff is efficient, reliable, and connects the town of Banff to key locations like Lake Louise. By parking your car at a large, free lot like the Banff Train Station and using it as your base, you can bypass the notorious traffic on the Trans-Canada Highway and the access road to Lake Louise. This strategy allows you to relax and enjoy the scenery from a bus window instead of white-knuckling it in gridlock. For attractions along the Icefields Parkway, the principle of avoiding peak hours (11 AM to 3 PM) is your best defence against congestion.
Adopting this mindset—viewing your car as a liability in the most congested areas—is the final piece of the logistical puzzle. It’s about being smarter than the crowds. The following park-and-ride strategy provides a template for a low-stress, high-efficiency trip through the heart of the Rockies during its busiest month.
- Establish Your Base: Park at the Banff Train Station, which offers extensive free parking. Make this your primary hub for the duration of your trip in the Banff area.
- Conquer Lake Louise Early: Book the Roam Transit Route 8X Express from Banff to Lake Louise, aiming for a departure before 7 AM to beat the worst of the highway traffic.
- Use Secondary Hubs: The Lake Louise Park and Ride at the Ski Resort is your gateway to the Parks Canada shuttles for Moraine Lake. Use Roam Transit to get here, then transfer to your booked shuttle.
- Time the Icefields Parkway: Schedule your visits to major attractions like the Columbia Icefield and Athabasca Falls for very early in the morning (6-8 AM) or later in the afternoon (after 4 PM) to avoid the midday tour bus rush.
- Leverage Midday Alternatives: Visit less-crowded but equally beautiful spots like Mistaya Canyon or Waterfowl Lakes during the peak congestion hours of 11 AM to 3 PM.
- Stay Informed: Download the 511 Alberta app for real-time updates on highway conditions, accidents, and traffic delays.
To put this all into practice, your next step is to open a calendar, note the 48-hour booking windows for your desired dates, and start building a detailed, multi-layered itinerary that assumes your first choice may not always be available.